Dark Angels Legion #3 – printer go “BRRRRTT”

I should be painting models, that’s what I am supposed to be doing. But I’ve got distracted again, its really not a surprise though. I stumbled across some really nice looking STL parts that would fit in really well with a Dark Angels force, and well I couldn’t resist printing and assembling them.

If you’re old enough a veteran hobbyist you’ll remember some metal space marine captains that had lots of cool details (for back in the 90s). Take a look at this page and you’ll see what I mean. In particular the veteran captain with the bionic leg. Now I am not right at this point wanting to build a Praetor/Centurion/Consul/HQ choice – whatever you want to call it. I just wanted to create a funky veteran sergeant to lead my tactical squad.

At this point it would be really cool to introduce you too “Sergeant Bob, a veteran of the x crusade, injured playing football” but as you can tell I have not yet procrastinated that much to avoid painting.

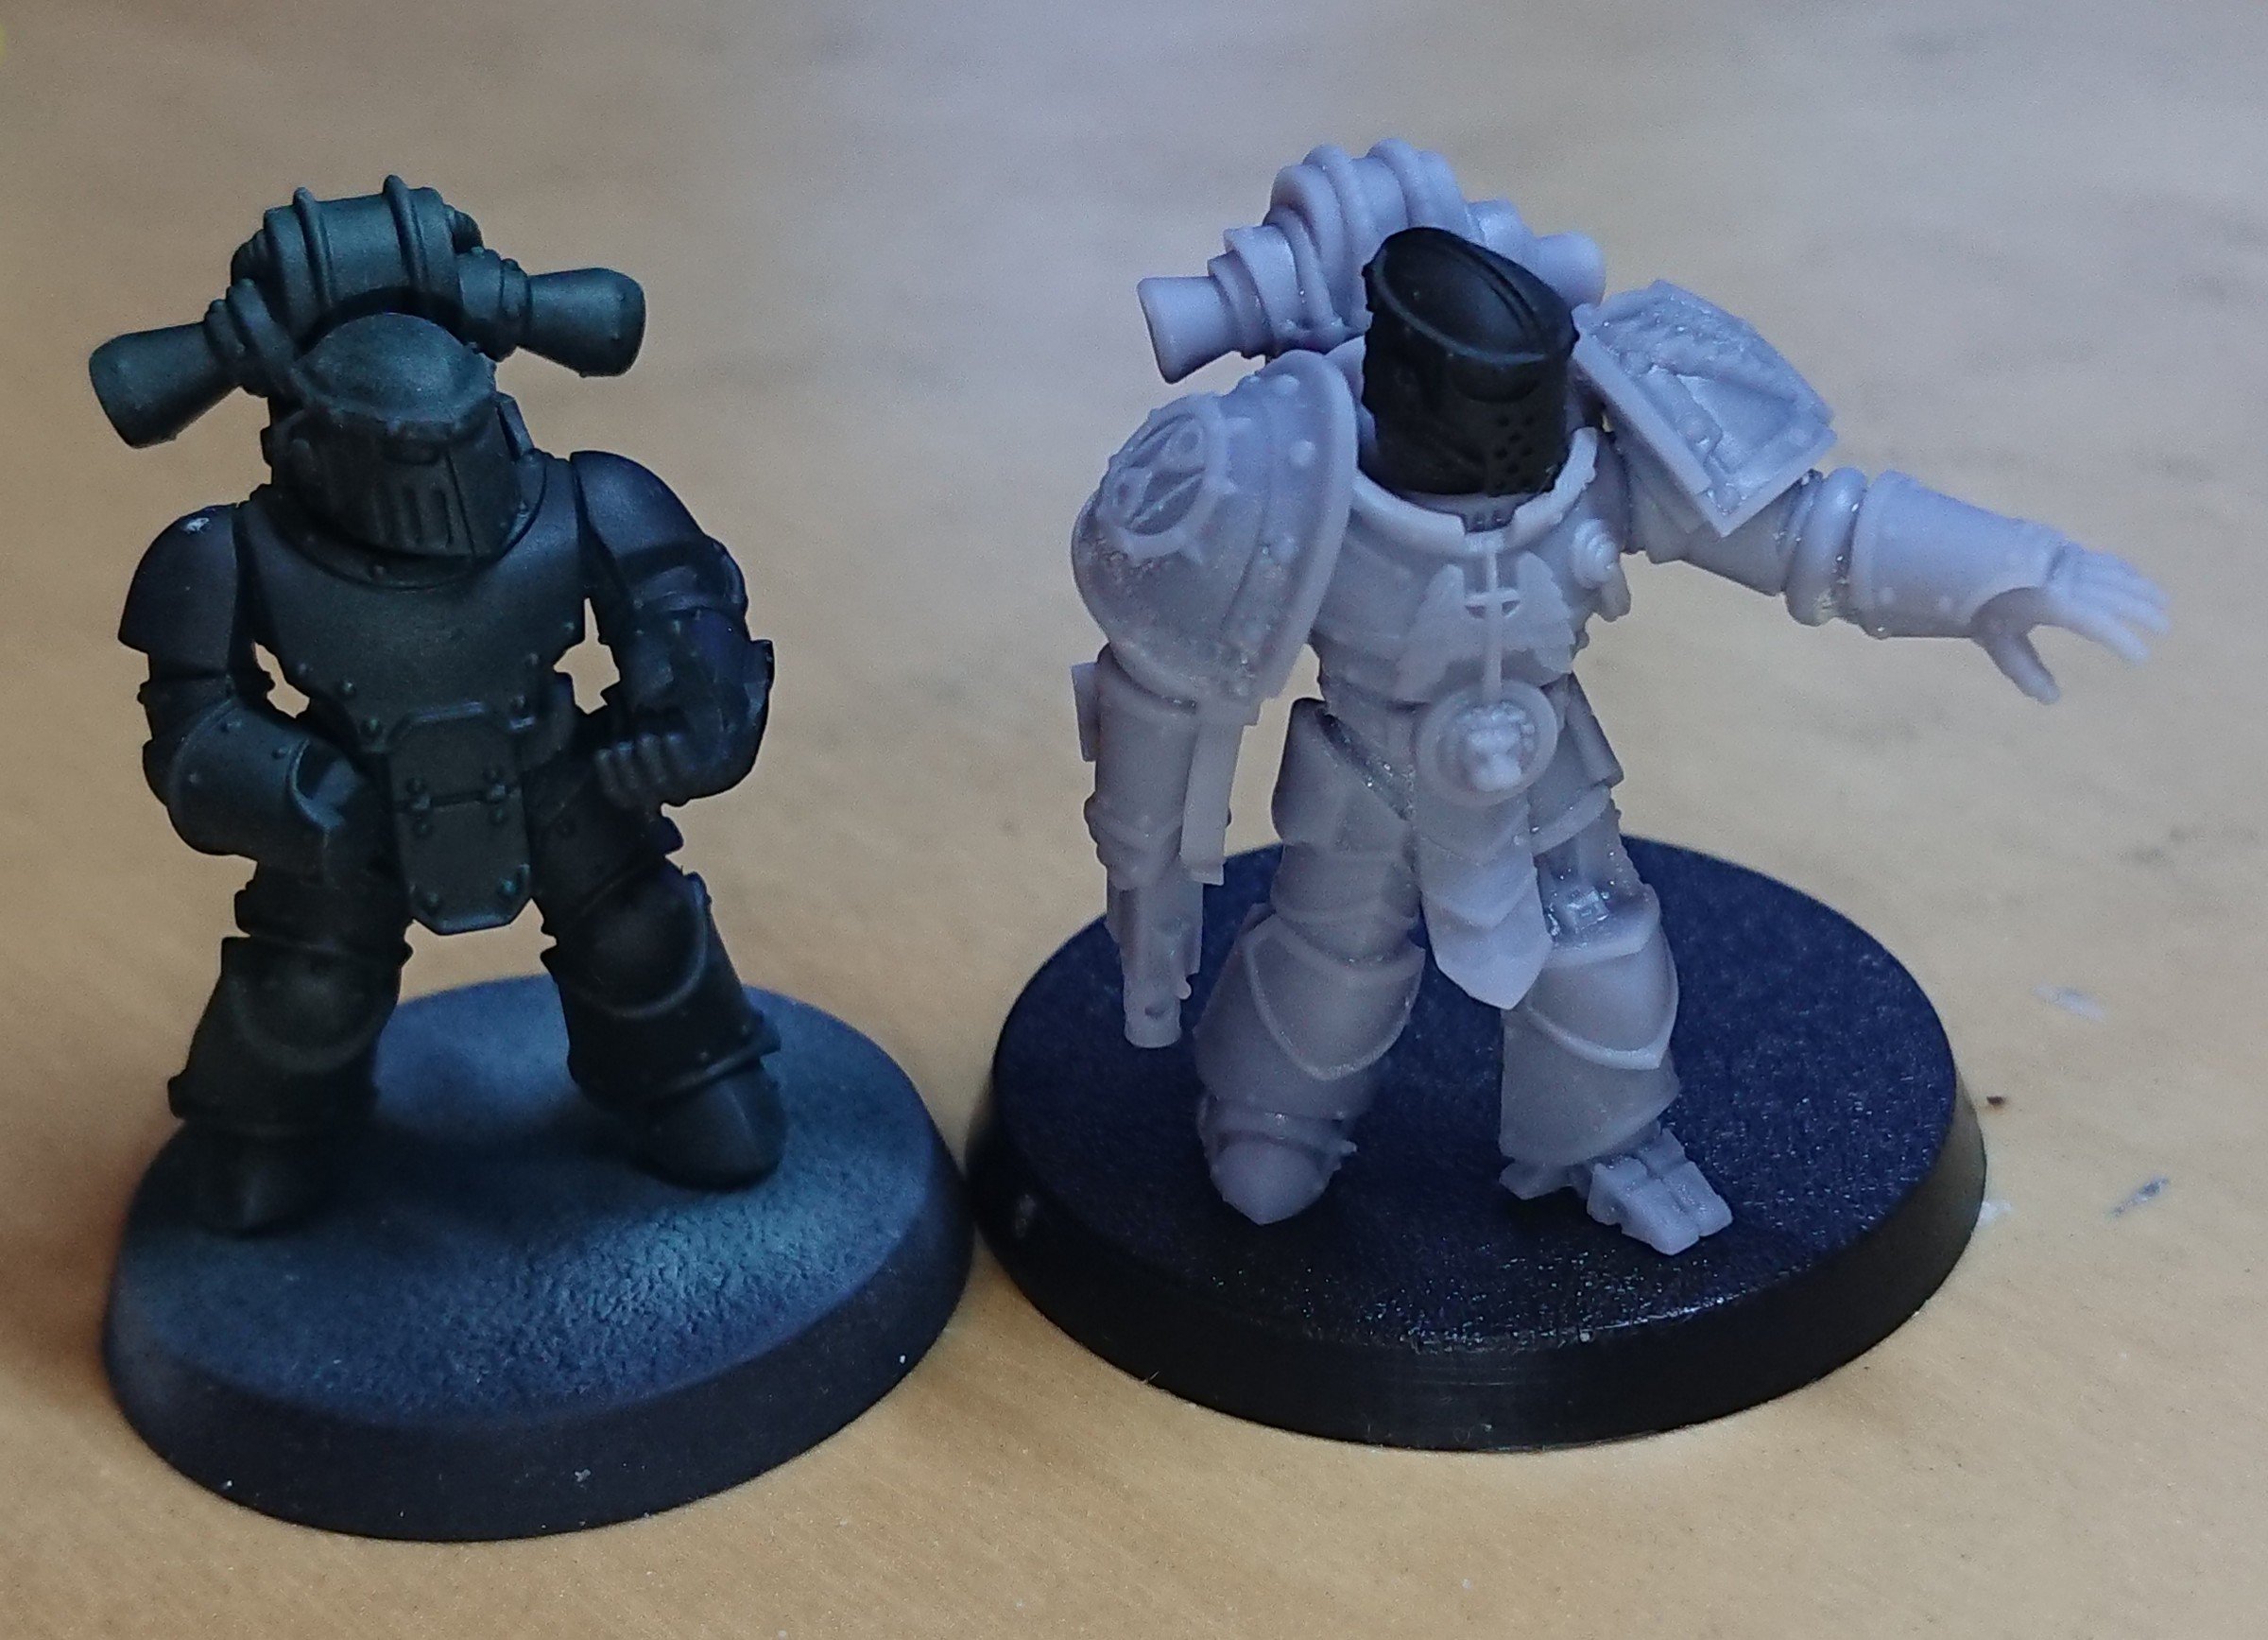
He isn’t on the correct size base, just a spare 40mm I had at hand to stand him on next to one of his future squad (that I should have been painting). If you’re interested* in printing/building your own I thought I would share the links to the various STL used.

  • Legs, come from Mildseven’s bionic leg pack.
  • Torso, is from OHM’s captain model.
  • Arms, are OHM’s alternate arms.
  • Shoulders – erm bugger I cant find these exact pads at the mo. If I do find the link I’ll come back and edit this post (I thought they were from here, but looks like they are not).
  • Head, the current head is now been removed from sale, but I have not 100% decided on this head yet. There is almost limitless variety of styles out there to choose from (example, example, & example). I might even just use a head from the plastic mk iii kit.

I think he’ll make a cool little addition to the squad and add a little extra character (pun not intended) to them. Now back to painting these guys!

Thanks for reading – here is the usual affiliated links paragraph. If you’d like to support the blog, please consider making your own hobby purchases through one of the affiliate links. It doesn’t cost you anything, I just get a little commission which helps pay the WordPress fees etc. You can click the links below or the webstore banners on the site.

Element Games (get double element crystals using code DAV615), and The Outpost.

*Its interesting to see how 3D printing is becoming more and more accessible, to the extent that gaming stores are starting to sell them.

Legio Solaria; Bringing the War

The UK has been in lock down for 3 weeks now, and on top of that I’ve also had a week of isolation so I’ve had 4 weeks of glorious hobby filled painting, right!?!?! Ahh well, as idyllic as it sounds spending all that time at home with family, reality is that I’ve had just as little time to myself as if none of this had happened. Yes, I can hear your snorts of laughter and groans of disbelief. I hold my hands up, I’m as staggered as you all at my apparent lack of progress.

The good news is, I have painted my garden fence panels…well until I ran out of fence paint (the wife says they need another coat).

“So what have I been doing worth writing about then?” I hear you ask…

Continue reading

Almost There: Legio Solaria Reaver Titan

I’ve very slowly been making progress on my Reaver Titan. It seems an age since I started down the Solaria road, and it has – think it was last December I posted my mottled green armour test. Today I glued armour plates in place, and messed with the Solaria decal sheets to save having to freehand anything. Having done that I felt like I’d actually achieved something – enough to blog about at any rate.

Anyhow here are some pics:

Continue reading

The First and Last Samurai

The last few days my spare hobby time has been taken up with assembling models for Test Of Honour. When I first opened the box and looked at all the components on the sprue, I have to admit I felt a little daunted. All those options! What would I build?!

I started on the force required for the first mission from the battle book. My previous post shows the first of this assembly spree. When clipping the parts off the sprue I began to think that these would be fiddley models to put together. However, I haven’t used hard plastic polystyrene models for some time and I had forgotten what an easy material it is to work with when building models. The mould lines (what little there were) were easily scrapped off with little effort. With the use of polystyrene cement even the most fiddly of two-handed weapon poses were simple to put together. Especially in comparison to the models like the old metal PP Steelhead Halberdiers. I have really enjoyed building these models.

Continue reading

Painting Experiments: Gold Non Metallic Metal

I recently got two Non Metallic Metal Paint sets for my birthday. It is a painting technique that I have never really tried, painting a metallic surface using solid non metallic colours by simulating the reflections of the metallic surface. It does look good when painted well, but looks off if painted poorly. This is my first real attempt at the technique and I thought I would post my thoughts on the two sets as I use them. Sounds like a review, but that implies I know what I’m talking about. No, this is more of a reflection of the NMM paint sets by an inquisitive hobbyist. Oh come on, you must have seen that pun coming at some point!

Why did i pick these two sets?

Paint_sets_edit

Continue reading

Guild Ball Prototype Range Rulers

Action_Union_Brewers

I decided I wanted to get some acrylic range rulers made for the game Guild Ball. My goal (haha i’m sooo witty 😉  ) was to make a set of useful measure guides fitting the most options into a single ruler as possible. So I set about designing a stick that could measure/guide the placement of models in a number of different situations. Sure they are a number of different manufacturers out there making measuring sticks (google image search). They all share a common design in that they a stick of a given lenght – no surprises there. I have a set of these for that. Other designs are such that you can place the template in contact with the ball or model’s base and then place the base at the opposite end of the template to achieve a given distance. Like the measuring sticks for X-Wing, measuring front of the base to back of the base. The issue with that is that you need a single ruler for each increment of distance you want.

So what have I done differently?

Continue reading

Project Deathwing: update test terminator

With finding the odd moment here and there I have finally managed to finish off the test Terminator for my Deathwing project. It took longer than it should have but that is real life getting in the way of hobby time!

I wouldn’t mind quite so much, if I had tried time consuming techniques (or ones that I find time consuming) but there is noting really challenging in this piece, which I hope will allow me to get a couple of Squads done at least.

Deathwing_A_05 Continue reading

Project Deathwing: update basecoat

Over the last week I have tried to grab a spare 10 minutes here and there to get some work done on my Deathwing Terminators. I have been using my airbrush, for two reasons really.

  1. Speed, although I am not very good at using my airbrush, it is far quicker than using a brush for putting down paint over the whole model. Time is a rare commodity at the moment, I’d probably still be painting the models dark brown now if I had used a normal brush with the limited amount of time I currently have for the hobby.
  2. Practice, I will only improve at airbrushing by using it.

Continue reading