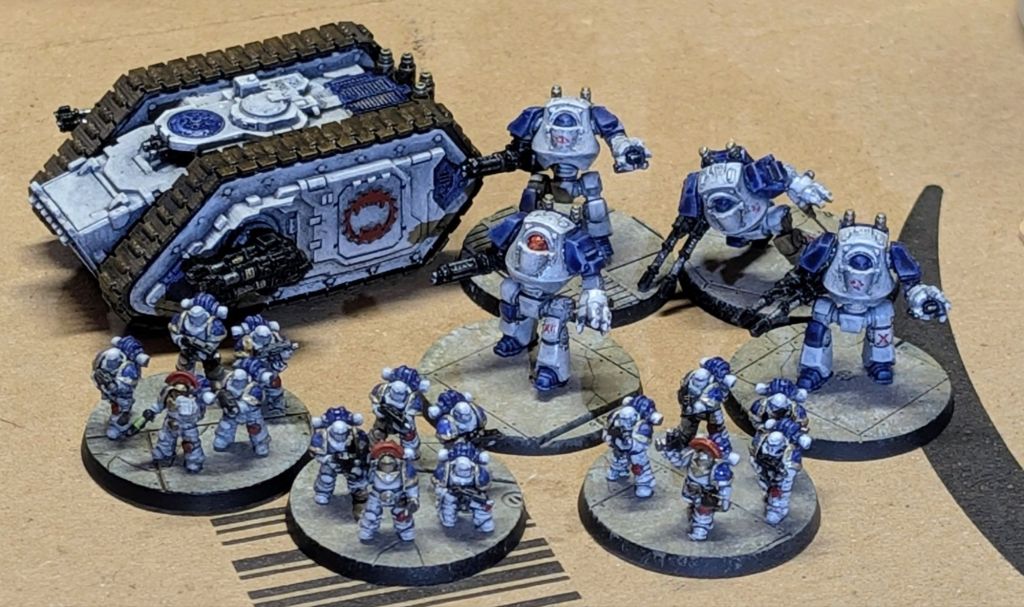
Just a quick post, I squeezed in a quick play time with the airbrush to see what I could do with my over primed HoG terrain. I just messed adding various colours to see what they would come out like. Here’s the result.
Still a way to go obviously, also need to practice with my airbrush aiming skills 😉 However I did feel like I made some progress experimenting on this piece. I’m not sold on my tree colour yet. Need to keep thinking on that.
Thanks for reading – here is the usual affiliated links paragraph. If you’d like to support the blog, please consider making your own hobby purchases through one of the affiliate links. It doesn’t cost you anything, I just get a little commission which helps pay the WordPress fees etc. You can click the links below or the webstore banners on the site.
Following on from the previous Warcry post where I built the Heart of Ghur terrain here’s the first post about painting the terrain. I expect painting the terrain is going to take up way more than one blog article. I have previously painted up the original Warcry starter set terrain and the Ravaged Lands Corpsewrack Mausoleum, both as commissions believe it or not, so I was striving for a bit of speed to get the job done. Both used multiple spray cans to get the base layers down to build up the colour scheme from. In an attempt to speed up the painting process I decided to use different colour rattlecan spray primers for the base layers of my Heart of Ghur terrain. Given that the Heart of Ghur (I’m getting sick of typing that, so from now on it is HoG) terrrain is natural in nature rather than ‘man made’ buildings i thought that more colours might be a good idea.
One of 2022’s impulse buys was the Warcry second edition starter box Warcy: Heart of Ghur. Way back in 2019 I bought the first edition starter, and loved playing it, even winning a local event with my Splintered Fang warband at the, now sadly closed, LGS. I can’t explain what it was but I ended buying Heart of Ghur, and then it sat in a box, unopened – still sealed in fact – until last week. My recent review of 2022 post got me thinking about unstarted/unfinshed projects. I just felt the need to start a clean slate, do something different and new.
As is tradition on this block at New Year, although its getting later and later in January, I have a look back at what I achieved hobby wise over the last year. I find making Hobby New Year Resolutions to be pointless, and possibly depressing, when you look back as see what I did compared to what I hoped. That said it can also be good to take a look and see what you completed.
A long over due update, but I have completed a second tactical squad for my Dark Angels. Simply just following what I did for the first squad really, in the previous posts. So there isn’t really an awful lot to talk about. Have some pictures instead 🙂
I was up early Saturday morning, sadly it wasn’t excitement of the new box arriving or the drive to finish painting my squad, but a trapped nerve in my shoulder I did a week ago. Still up I was, and so I took the opportunity to paint the Dark Angels (its my left arm that’s causing issues, I’m right handed, and the gentle manipulation of holding a model while painting it has actually helped keep the pain at bay – lucky eh!). First job was to finish off the bases, which I outlined in my last post. Then I moved on to the eye lens.
I gave a the lens a base coat of VMC Ice Yellow, leaving a black border around the lens as best as possible.
Using Citadel Blazing Orange (probably ~25year old paint pot – its a thin bright orange) I painted the pale base coat orange.
After doing this I realised that the silver armour trim could do with a little highlighting. I used a nice bright silver, VMA Silver, to pick out the edges on the trim. I concentrated only on the head and front of the shoulder pads, and the two bands on top of the back pack. This was for speed, and because the head and immediate surrounding area are the focal point of the model. I tried a random criss-cross pattern to go along the edges trying to create a battle worn edge rather than a pristine edge highlight.
Did you pre-order ‘Horus Heresy: The Age of Darkness boxed set’? Have you had a dispatch note to say its shipped? Is it arriving tomorrow eek later today? Did you set yourself a target of painting a tactical squad and transport before the new box arrives? If you answer yes to all these, perhaps you’re in the same boat as me?
Previously I mentioned that I had completely messed up placing a decal on the shoulder of my test marine. I ended up free-handing a tactical marking on the right shoulder pad. This left me pondering if I should now freehand the remaining 9 marines’ shoulder pads, or risk trying the decals again. I procrastinated long and hard over this issue – as is typical for me – to the point where its ‘Heresy Eve’ and my tactical squad isn’t finished! Panic was setting in, a decision needed to be made… freehand work or decal work. The freehand won, so it was time to break out the big guns.
As I mentioned in my previous post, I managed to grab some hobby time on Sunday to continue painting the tactical squad and Aion Advancer. The tactical squad had all the trim and various gubbins painted VMA Gun Metallic. While the highlights on the armour were applied with Scale 75 Arphen Jade, followed by VMC Ice Yellow. I quite like how they look at this stage, except that they aren’t black enough for me here for what I am aiming for with the Dark Angels.
Before I glued the shoulder pads in place I finished off the white Dark Angel logo. This was painted in 4 steps.
With the release of the Horus Heresy 2nd edition box rapidly approaching I really needed to sit down and get some paint on my tactical squad and transport if i wanted them painted before new stuff turned up! So I sat down and did some painting Friday night, I managed to get the first of the squad nearly finished.
This particular marine is the squad’s pathfinder, taking one for the team and working out how to paint them up. Following on from their green-black airbrush session, they were highlighted with Scale 75 Arphen Jade, with a final sharp highlight of VMC Ice Yellow.
With the green armour done, I quickly finished the trim with a gun metal silver, and glued the shoulder pads in place. The white DA symbol was based in a dark grey, then a medium grey, white grey and a pure white (I’ll detail that better in a later post).
The model was hit with a gloss varnish in preparation for a black oil wash. But before the black wash i needed to add the decal to the model’s right shoulder pad. This is where disaster struck and I made a right mess of placing the decal, and then subsequently made a bigger mess trying to get it off.
But we carried on and got this this stage on Saturday morning, having waited for the gloss varnish to dry some more before applying the oil wash.
I managed to get more painting done on Sunday, but that’s for the next post.
Thanks for reading – here is the usual affiliated links paragraph. If you’d like to support the blog, please consider making your own hobby purchases through one of the affiliate links. It doesn’t cost you anything, I just get a little commission which helps pay the WordPress fees etc. You can click the links below or the webstore banners on the site.
I should be painting models, that’s what I am supposed to be doing. But I’ve got distracted again, its really not a surprise though. I stumbled across some really nice looking STL parts that would fit in really well with a Dark Angels force, and well I couldn’t resist printing and assembling them.
If you’re old enough a veteran hobbyist you’ll remember some metal space marine captains that had lots of cool details (for back in the 90s). Take a look at this page and you’ll see what I mean. In particular the veteran captain with the bionic leg. Now I am not right at this point wanting to build a Praetor/Centurion/Consul/HQ choice – whatever you want to call it. I just wanted to create a funky veteran sergeant to lead my tactical squad.
At this point it would be really cool to introduce you too “Sergeant Bob, a veteran of the x crusade, injured playing football” but as you can tell I have not yet procrastinated that much to avoid painting.
He isn’t on the correct size base, just a spare 40mm I had at hand to stand him on next to one of his future squad (that I should have been painting). If you’re interested* in printing/building your own I thought I would share the links to the various STL used.
Shoulders – erm bugger I cant find these exact pads at the mo. If I do find the link I’ll come back and edit this post (I thought they were from here, but looks like they are not).
Head, the current head is now been removed from sale, but I have not 100% decided on this head yet. There is almost limitless variety of styles out there to choose from (example, example, & example). I might even just use a head from the plastic mk iii kit.
I think he’ll make a cool little addition to the squad and add a little extra character (pun not intended) to them. Now back to painting these guys!
Thanks for reading – here is the usual affiliated links paragraph. If you’d like to support the blog, please consider making your own hobby purchases through one of the affiliate links. It doesn’t cost you anything, I just get a little commission which helps pay the WordPress fees etc. You can click the links below or the webstore banners on the site.