
I created a poll to see which of the Early Access Godtear models I assembled first. The winner of the vote was Shayle, Keeper of the Oath, and his follower, Golem. This post is how I went about putting them together.
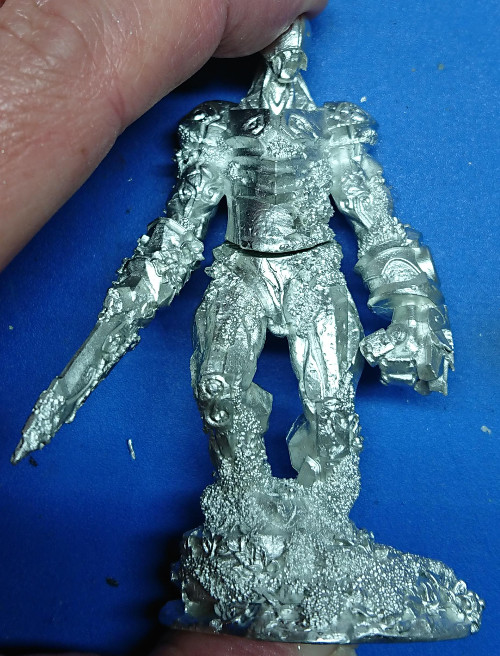
These are the models’ components straight out of the box. They are very large lumps of metal! The sculpts are really nice with not much work required to clean mould lines off them. A few minutes with a craft knife and a file removed all of the noticeable mould lines.
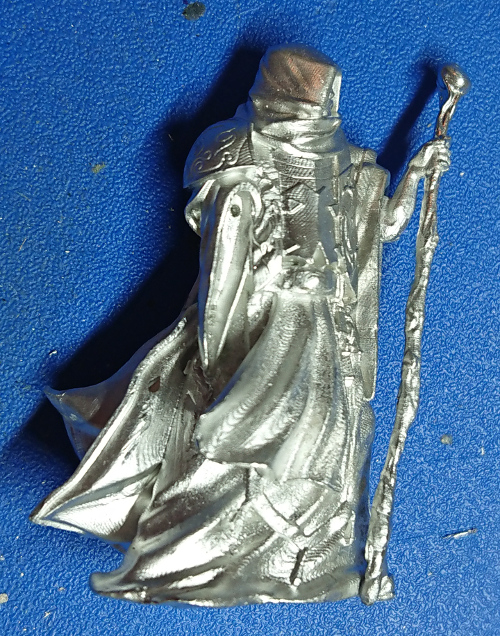
Front view of the parts:
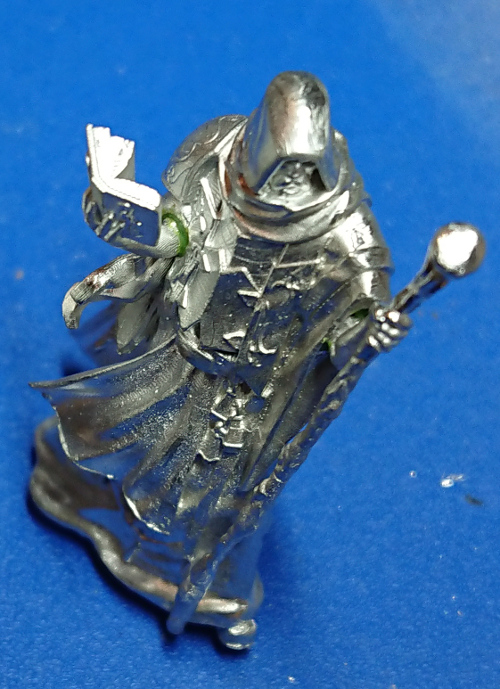
View of the rear of the parts:
Golem
The back of Golem’s head was the only place any real clean up work was required. This is where a mould gate was located.
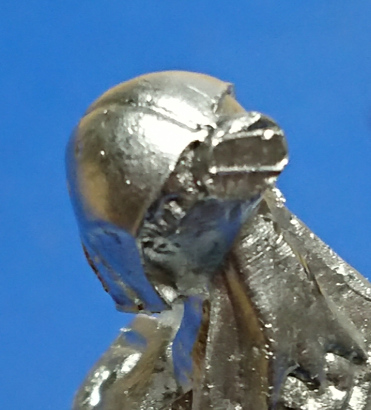
I cut this off with a pair of side cutters as close to the head as I could and then filed the remainder down with a file.
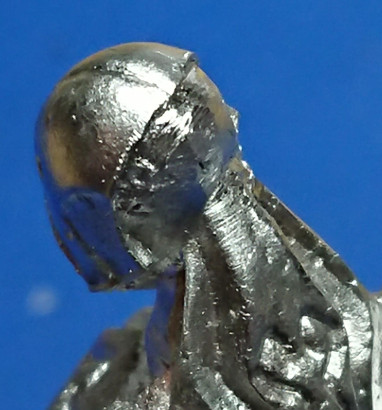
It looked a little smooth in comparison to the rest of the model’s surface, so I gouged some shallow indentations into the back of the head with the tip of my craft knife to give some stone like texture.

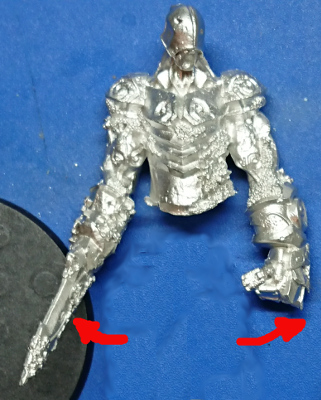
I test fitted the body and legs together and found there was some excess material to remove to get the joint surfaces smooth. The images below show the areas (shaded red) I shaved metal off with a craft knife to make the joining surfaces smooth.


When I put the two halves of Golem together this is the gap I was left with. Note that because I’m holding it with my hand this is the gap at its largest. This is not a major thing, just needs a little bit of greenstuff to fill it later on.
I also noticed that the Golem’s right arm was interfering how I wanted the torso to sit on the body. I guess the arm got slightly distorted when it was being removed from the mould. The arm kept touching the leg so the torso did not sit where I wanted it to. I corrected this by carefully pulling the arms apart. I say carefully, but this is a chunky model and it takes a fair bit of force to open the arms up even just a little bit.
With the body fitting together OK I decided to pin the two halves together and make it nice and sturdy for when it comes to filling the gap at the waist. To do this I drilled a hole into the centre of the recess in the torso. I used a 0.8mm drill bit, as I have 0.8mm diameter brass rod.
For the legs I filed a flat section to the top of the ball-shaped key that locates in to the body’s recess. I then drilled into the centre of flat section for the pin. When I test fitted the legs to the torso I found that the gap had almost gone. Obviously filing the top off the ball-key did the trick, but seeing as I had already drill the holes I still pinned the two halves together.

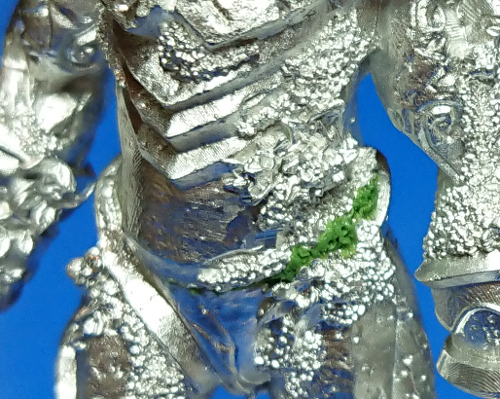
With the model altogether I used some greenstuff to try to hide the joint line where there is foliage or plant growth on the model. I didn’t mind the joint line being noticeable on the rock surfaces. However, the joint line running through foliage looked silly, so I tried to hide it by trying to match the surrounding surface textures with greenstuff.
Shayle, Keeper Of The Oath
Like Golem, there wasn’t much to do in way of cleaning mould lines. There was a mould gate to clean up on the top of the stave though. This was easily done with a file.
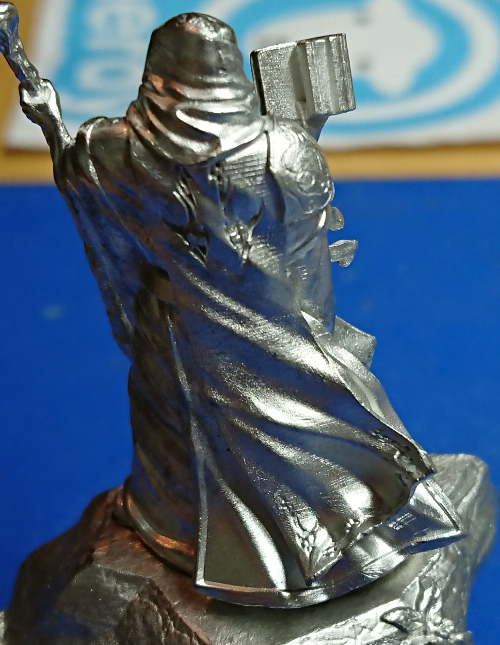
There is something going on with the casting on the rear of the model’s robes at the bottom. I think it is some sculpted detail that hasn’t quite come out as clear as it was probably sculpted. I was tempted to smooth this area out with greenstuff. However it’s entirely possibly this will look as it is intended to when the model starts getting painted.
Assembling Shayle was pretty easy. I am a person who likes to pin joints where ever possible, sometimes even when it’s not needed at all (like Golem’s waist). I decided to pin both of Shayle’s arms. I forgot to take pictures doing the first arm, holding the stave. However this arm possibly doesn’t need it. If you look on top of Shayle’s rock you can see two foot prints and a shallow hole. These help locate Shayle on the rock, the shallow hole below the right foot print (as you look at the picture below) is for the bottom of Shayle’s stave. The stave also has a slight notch at the bottom where it nests up to the hem of Shayle’s robe. So along with the arm itself that is 3 connection points.
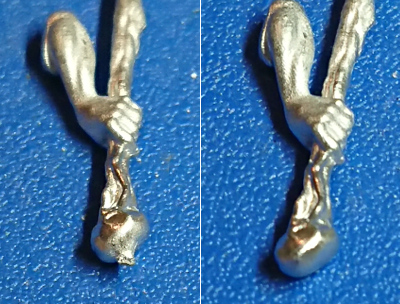
However I did pin the stave arm, and I did it in the same way I did for the book arm below.
To help locate the drill bit on the part to be drilled I push the point of my craft knife exactly where I want the hole to be. I then give the knife a slight twist as if i was trying to drill with the knife. This creates a shallow pin pointed mark. Now when you use the pin vice the drill bit will be much easier to control as it will not slip off the part. For the arms I used a 0.5mm drill bit and 0.5mm diameter brass rod.
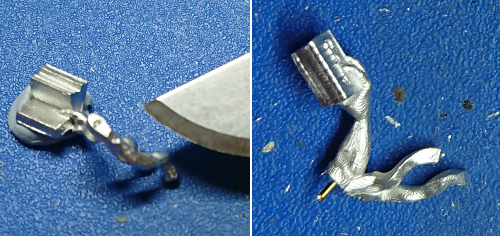
I match up the location to drill in Shayle’s sleeve, and do the same again. I have gotten quite good at eyeballing where to drill on the opposite side of the joint over the years.
There are a couple of ways to do this if you can’t eyeball the spot well enough. My favourite is to cut a section of brass rod much shorter than you’d use as the pin. Just leave a small section sticking out of the side you’ve drilled (make sure you can get it out with tweezers or side cutters when it’s fully pushed into the hole). Then push the two parts together as if assembling them, the brass rod will leave a slight mark on the opposite side where you need to drill.
You can see below where I have drilled for the book arm, and the assembled stave arm.
With both arms in place I took some greenstuff and filled the small (well OK then, tiny) gaps around where the arms locate in the sleeves. There was no real need I suppose, but I felt it looked better once I did this.
Basing
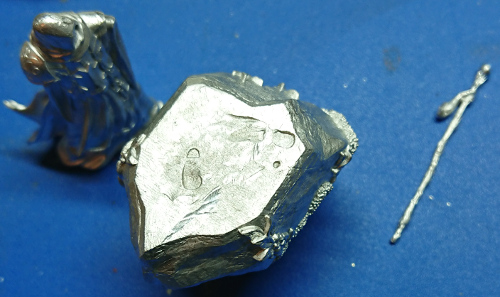
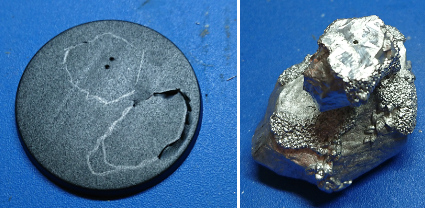
As both Shayle and Golem are standing on large rocks, I didn’t feel the need to do a lot with the bases. That said, Shayle’s base does lend its self to doing something with it because of the large overhanging element to the rock. I decided to give myself the option of doing some water effects with Shayle’s base by making part of the base lower than usual. I also decided to pin the rock to the base, as that is a lot of metal on a relatively small contact area. I marked out where the rock and ‘puddle’ were going to go, drilled holes (and got it wrong on the plastic base – what did I say about eyeballing things earlier), and cut out the puddle.
There are some stiffeners on the bottom of the bases which are not actually the full depth of the base. I had some scrap thin plasticard left which sat in the bottom of the base without having to remove those stiffeners. I cut out a rough circle of the card to fit in the bottom of the base.

The rock is a big lump of metal, because of this I didn’t think a straight pin would do much good into the thin plastic. So I bent a right angle in to a section of brass rod about 3cm long. I put this through the hole in the base and glued the horizontal section of rod in place with superglue.
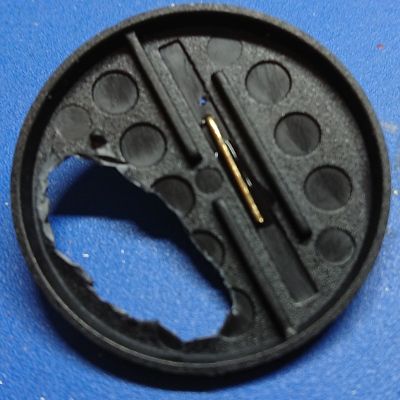
After gluing it in place, I realised I could have just used greenstuff to hold it. As the plan for the plasticard was to put greenstuff around the edge of the hole in the base and push the base down onto the card. I put greenstuff over the brass rod, around the edge of the hole, and in a couple of other spots to help stop the plasticard flexing lose.
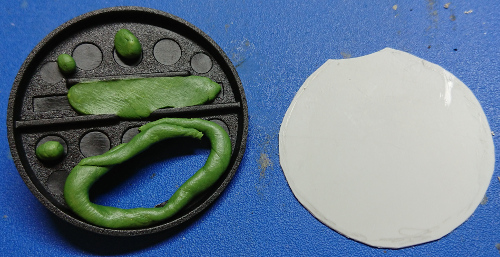
With the plasticard in place I tidied up the inside edge of the ‘puddle’. I then covered it in glue, attaching the rock, and flocked the base in sand. I also did this to Golem’s base too.

If you look at the top of the rock in the picture above you’ll see I’ve drilled a hole to pin Shayle to his rock. This isn’t because I think it needs to be, it’s because I plan on painting Shayle separately and the pin will give me something to mount him to a cork with.
Shayle and Golem Assembled
I’ve said enough, here’s the pic…


Pingback: Assembling Blackjaw and Savages | Splayed Paint Brush
Pingback: Assembling Raeth Marid | Splayed Paint Brush