
A local Infinity gaming group has started running online painting competitions to keep the Infinity hobby alive during the eleventy-third* UK lockdown. Instigated by the local warcor, Lawrence, via the FB group as a good attempt to keep up peoples’ motivation, and morale too. They are a good friendly way to get some minis painted. There’s about two months to get a model painted up for the comp. I used the Sphinx as my entry for the second painting competition – I didn’t complete an entry for the first competition.
Building It…
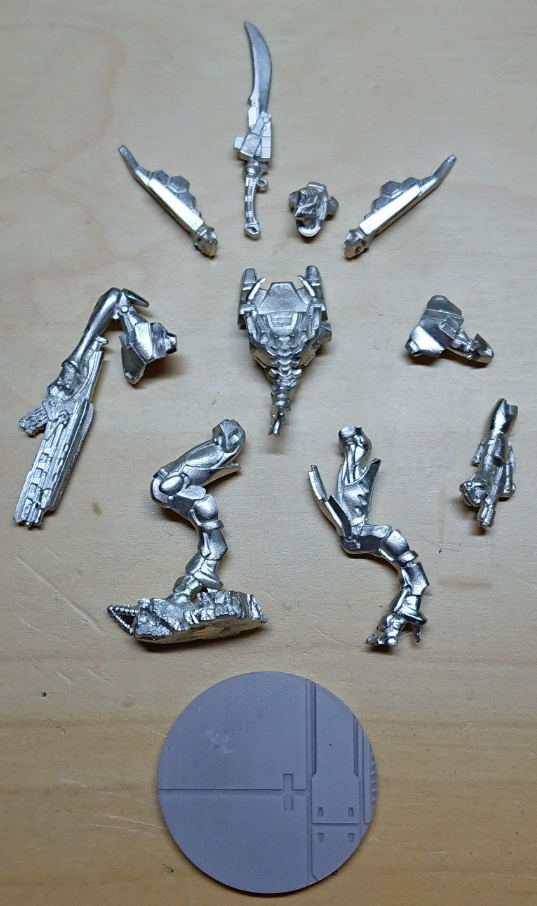
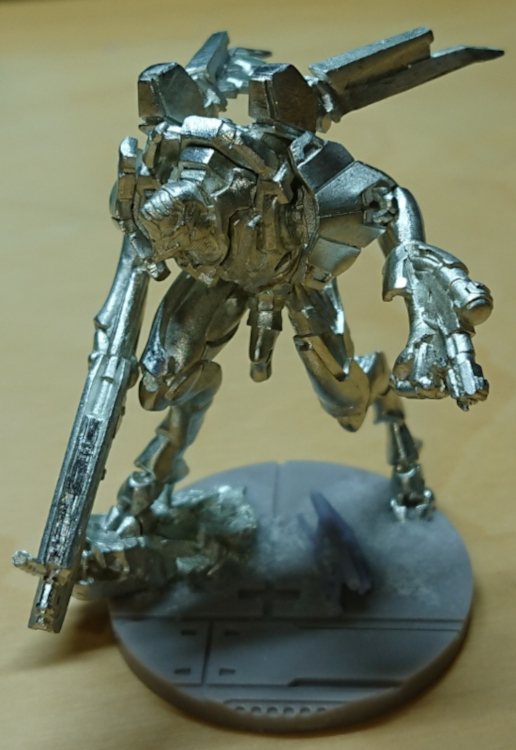
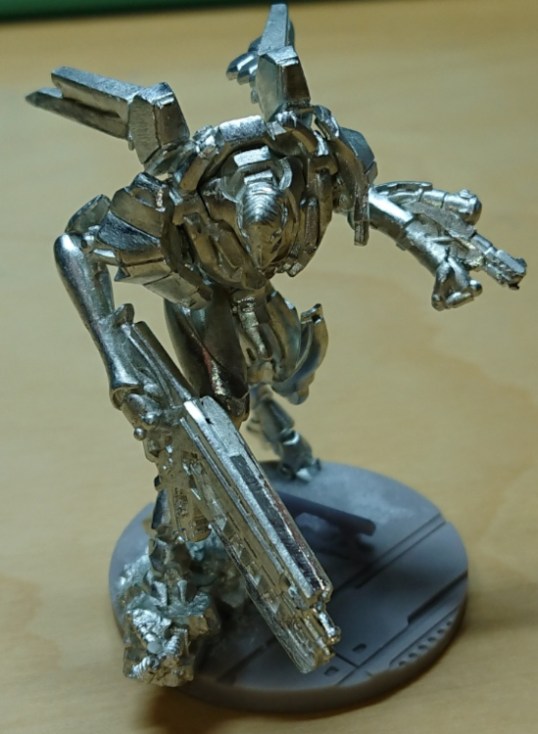
The model is a recent release from Corvus Belli (October 2020-ish) and as such is a nice piece of digital miniature design that fits together well. Although I have to admit that because I have been building a lot of GW plastic kits recently that the slender heavy metal parts did feel unfamiliar at first. I can understand peoples’ feelings of apprehension at tackling a metal model if they are used to dealing with plastics. The principles are the same, its just the methods and materials may vary slightly. For example a small model file is probably more useful than a mould line removal tool, and polystyrene cement simply wont work so you’ll be using superglue instead. After I’d cleaned up the model, removed mould lines and casting vents here’s what i ended up with.
The build was pretty straight forward, normally I’d pin everything but I was feeling lazy. So I just used superglue and greenstuff method. That is I mixed up some greenstuff putty (GS), and put a small ball into the joint as I superglued it together. Then squeezed the parts together. If you have just the right amount of GS it’ll just and no more squeeze out of the joint. The glue will hold it together after a short amount of time and the GS will harden and add to the strength of the joint as it’ll fill all the gaps in the joint. This was done on the legs/hip/waist joint, the left elbow joint, the antenna/holo-camo-wing-thing joints. The arms I was a little more paranoid about but still too lazy to find my pinning stuff. So I thought I would try something different.
I drilled into the two sides of the joint, so into the body’s shoulder, and into the top of the arm. The drill bit was last used for drilling out some bolter barrels, and was easily >1mm. This is way bigger than any of the rod I have…somewhere…and too lazy to find. Then used the GS again in the joint, but with a little bit more than expected, but its still about half the amount shown in the image with the gun arm below. The idea being that the glue and GS would fill the drilled holes moulding their own ‘pin’ in the joint. Will it work? <shrug> Will I ever know it worked? I seriously doubt it, probably be fine with just glue anyway.
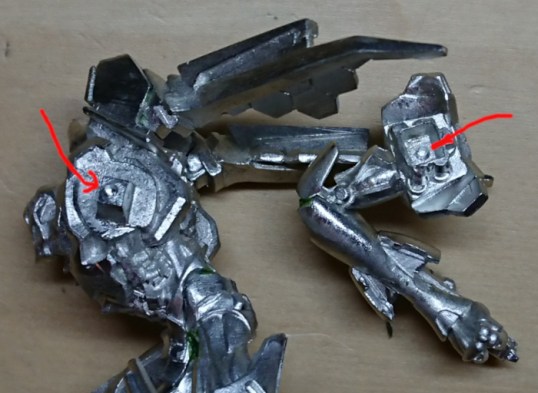
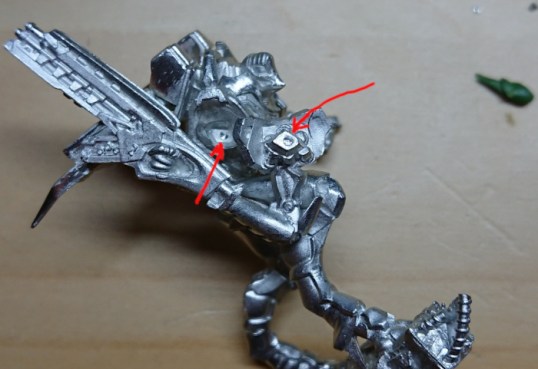

Now all that was left to do was tidy up around the joints where the GS had squeezed out. You really don’t need a lot of GS in the joints, and neither do you need a lot of superglue. Scrape away the excess and with a suitable tool mould what little is left into the joints if there is any gap at all. The image below shows the results of that on most of the joints; legs, elbow, shoulder, wing things.
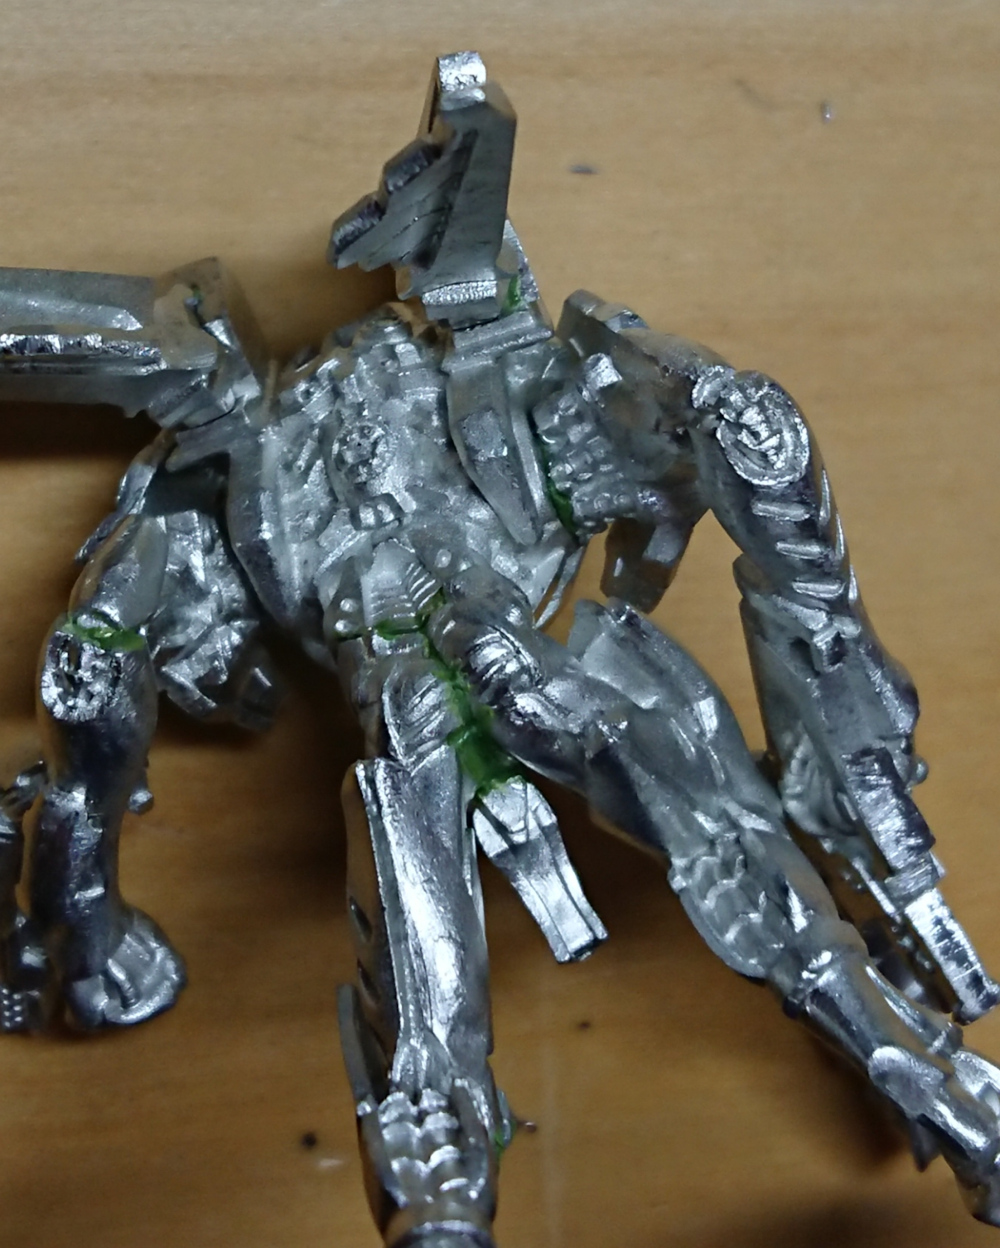
The its just a case of gluing to the base, no pinning required as there is a massive ‘tactical’ fallen concrete pillar. I superglued the model onto the resin base, and then to make the clean style base tie in with the tactical debris I used superglue and baking powder to add the finer ‘concrete dust’ and some scrap plastic for more interest.
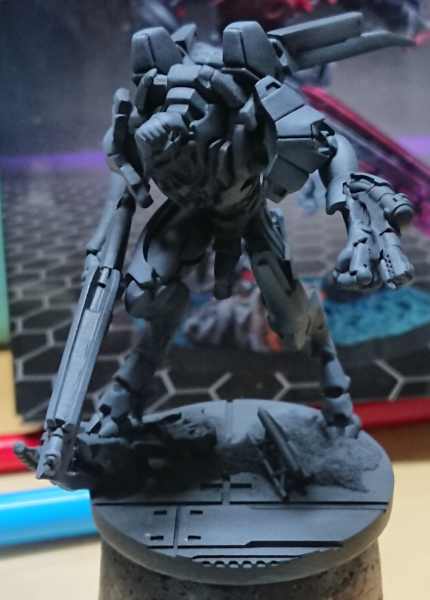
It was then rattle can spray primed black (Army Painter black for what its worth).
Painting It…
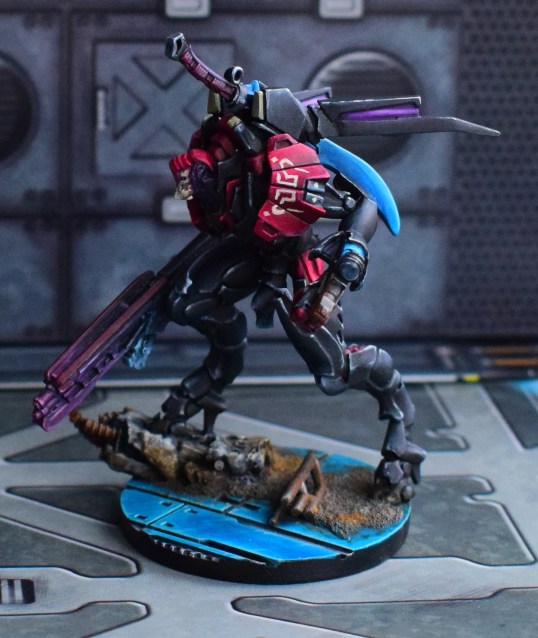
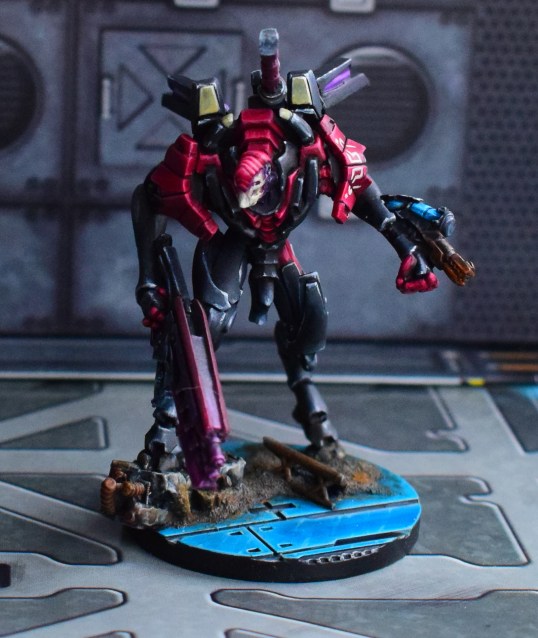
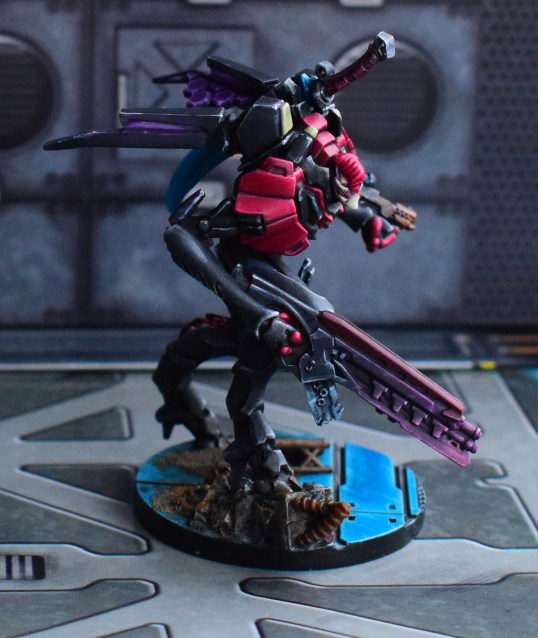
I didn’t do anything original here, I simply followed the Shasvastii painting guide found in the Vallejo Shasvastii paint set (see this post for more info on that set), using the box art for inspiration.
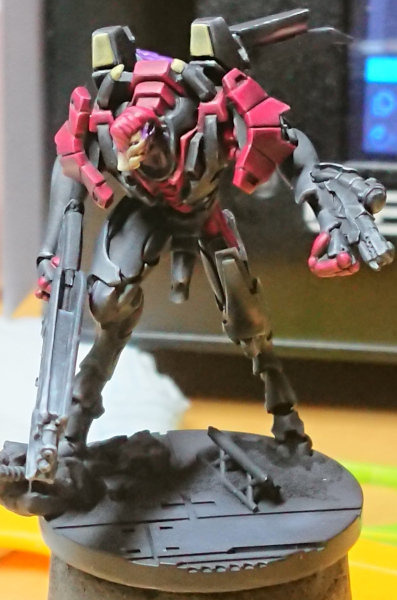
In addition to the colours from the Vallejo paint set I used the following colours to paint up the Sphinx.
- White, to add the final highlights to the black armour, blue sword blade, the weapon magazines, etc.
- Two blue paints, a VMA dark blue* and VGC Electric Blue, for the swords and blue weapon magazine elements.
- Orange, in this case Citadel Blazing Orange – yes a long OOP pot 😲, for glazing the flamer.
The base used the most additional colours as I wanted something different to the actual model. The base was painted quickly with a thin coat of dark grey to define the various shapes and their boundaries. The various elements were then painted as described below.
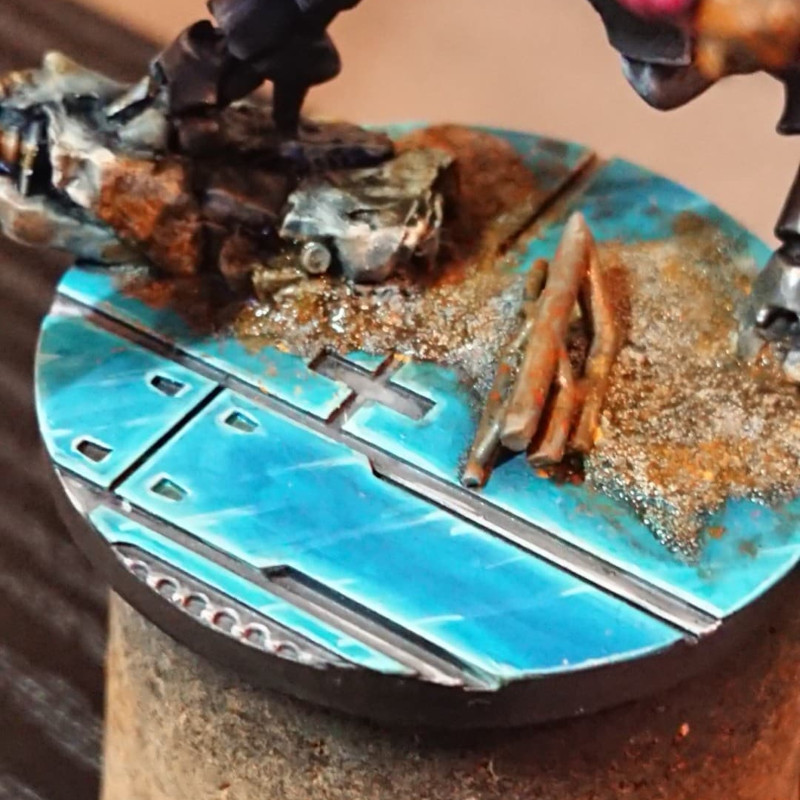
the concrete was quickly painted grey in a couple of thin coats and then dry brushed grey followed by grey. The re-bars were painted in greys, dark grey, then base grey and highlighted grey.
- The concrete and debris was quickly painted in a couple of thin coats of a VMA dark grey*. Then a quick overbrush of a VMA medium grey*, and finally a drybrush with VMA White Grey. The metal pipes and the rebar sticking out of the concrete were painted with the same colours but more along the lines of NMM style with targeted highlighting rather than just a drybrush.
- The deck plates were given a base coat of VGC Falcon Turquoise, and then VMC Light Blue RLM65 was blended to highlight the plates. The dark blue used earlier was used to shade the central plate area when I got the plate too light. The Ivory from the Shasvastii set was used the highlight the blue edges. While the medium grey and ivory were used to highlight the grey decking between the blue plates.
- The pipes and rebar were given a splotchy glaze using mix of VMA Camo Medium Brown and Blazing Orange – just to dull down the orange a bit. This was to try and give a rusted appearance to the metals. The concrete and debris was given a wash of AP Dark Tone Ink, and then AP Soft Tone Ink which was also pulled over the decking next to the debris. Finally, some Kromlech Light Mud weathering powder was splotched on to the base while the wash was still damp – I was rushing to finish – with a little applied onto the lower legs/feet of the model.
Final Images…

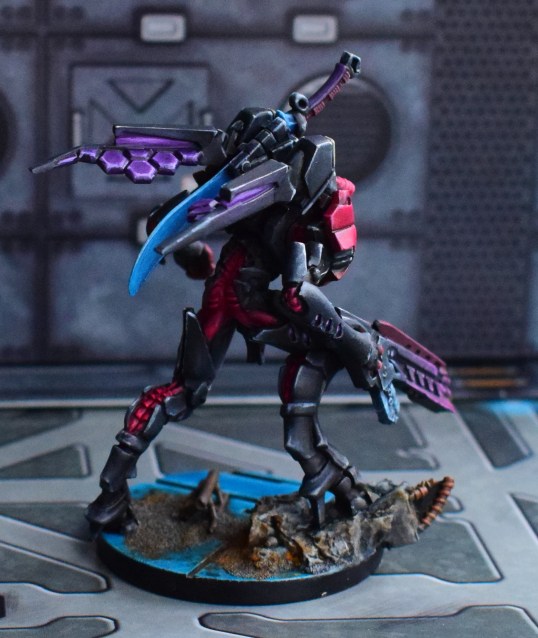
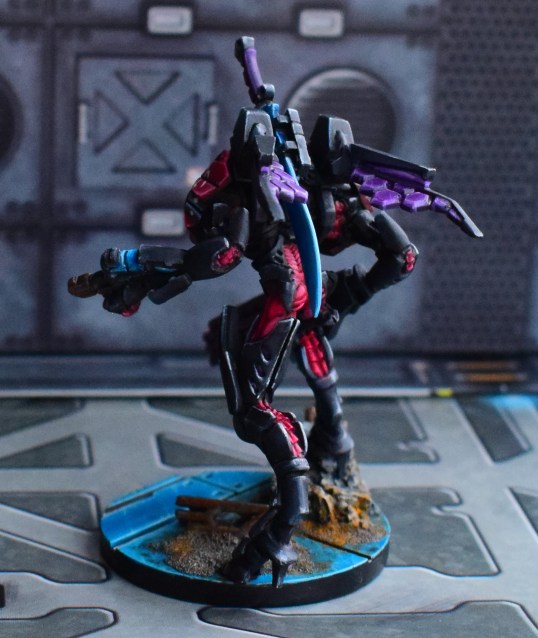
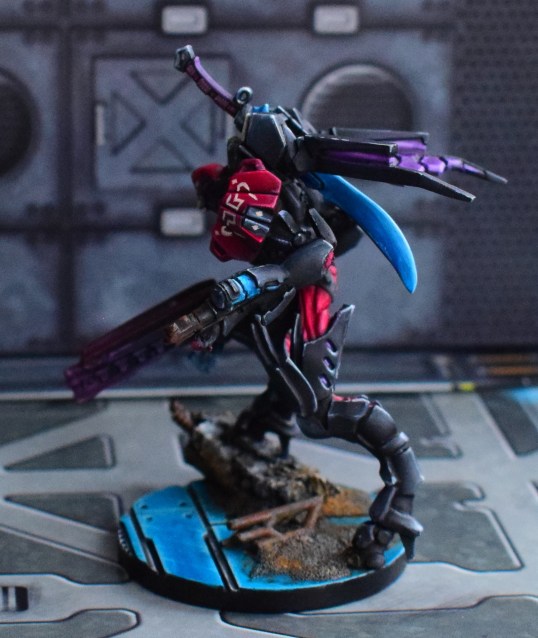
At some point in my life I thought I knew how to take a photo, this is the third attempt and I broke out the wife’s proper camera to take them. Doesn’t help I intended to do this in the day but it was closer to late afternoon and hence losing the light. Still there’s some mostly in focus pictures for the blog.
Affiliate links…
As always here’s some links to the various items mentioned above, if you want to try some of it yourself. Or if you feeling like supporting the blog while quenching your own hobby thirst, use the links to the right.
- Shasvastii Sphinx – EG – GG – OP
- Vallejo Shasvastii paint set – EG – GG – OP
- Antenocitis Workshop Centrum Crypt bases – 25mm – 40mm – 55mm – not an affiliate link but great bases!
- VGC Electric Blue 72023 (EG, GG, OP)
- VMA White Grey 71119 (EG, GG, OP)
- VGC Falcon Turquoise 72024 (EG, GG, OP)
- VMC Light Blue RLM65 71008 (EG, GG, OP)
- VMA Camo Medium Brown 71038 (EG, GG, OP)
- AP Dark Tone Ink (EG, GG, OP)
- AP Soft Tone Ink (EG, GG, OP)
- Kromlech Light Mud weathering powder (EG, OP)
- VMA Dark Sea Blue* 71087 (EG, GG, OP) – this is not the colour I used! WTF!
- VMA Dark Sea Grey* 71048 (EG, GG,) –
- VMA medium grey*
OK, I am baffled, in looking for the links to some of the Vallejo Model Air paints I used I’ve discovered that Vallejo changed the Model Air range at some point. It would appear that some of the colours’ names/identity codes/and worse actual colours are now different from when my paint pots were manufactured. The ones marked with an * are the troublesome paints. For example, VMA 71087 is called ‘Dark Sea Blue’ on my pot, but the three links above go to the same product code, but have a different name ‘Steel Blue’ and that blue looks much lighter than what I have in my hand. The VMA 71048 Dark Sea Grey I used appears to be now called Engine Grey and looks the right colour (display screen permitting). However the medium grey i used is unknown as the name and product code have rubbed off the bottle’s label.

Pingback: New Year, New Hobby | Splayed Paint Brush