After posting my Pathfinder Dronbot up on-line, I got a lot of positive comments about the base it is mounted on. I figured I would do a small series of articles about how I go about making the bases for my Infinity models. I intend this to be the first of 3 posts talking about my Infinity base toppers. Something along the lines of this:
- Making the bases.
- Casting my bases. “Basing my Infinity: Part 2“
- Painting bases. “Basing my Infinity: Part 3“
Hopefully that will show you how I went about creating this style of base that I am using on my Panoceania models.
First off, what’s a ‘base topper’? Simply put, it is a pre-made scenic base that is glued on top of the black plastic base that comes with the model, rather than replacing the standard base entirely.
Why am I making a base topper rather than a full base? No real reason, just personal preference. You could of course mount all of the following base building steps straight onto a standard black base.
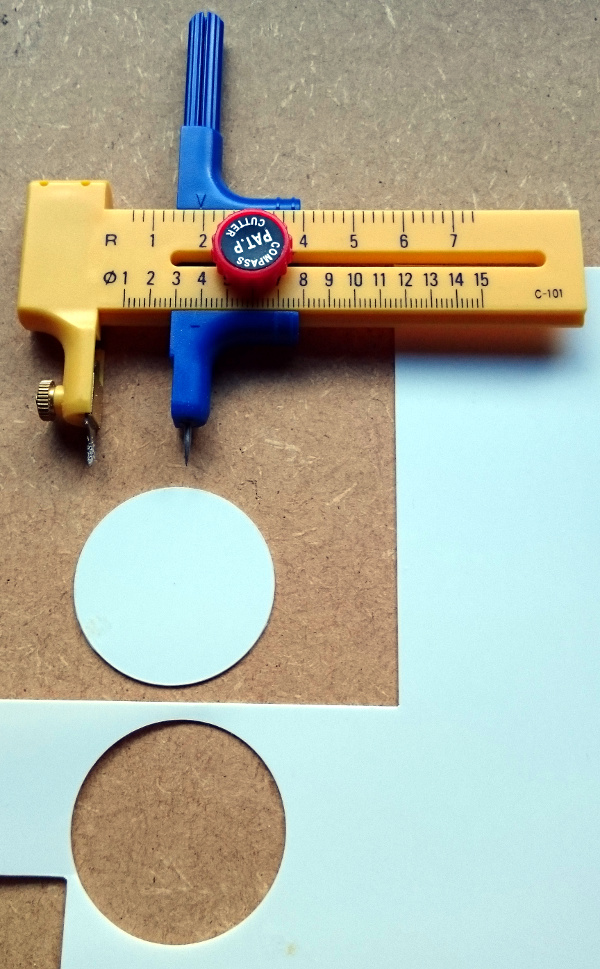
The first thing to do to make your base topper is to cut some circles out of plasticard. I have been using a circle cutter to do this but it can be done with scissors or a craft knife if you are careful. Here are the sizes of circle I cut depending on the base’s size:
- 25mm base – 24mm circle
- 40mm base – 38mm circle
- 55mm base – ??? I’ll be honest I haven’t made one this size yet.
Now those dimensions are approximate as my circle cutter is made out of plastic and flexes a little when used. However if you take your time and let the blade do the cutting rather than trying to apply too much pressure then it’ll cut a neat circular disc. I use two thicknesses of plasticard, a thin sheet ~0.5mm thick, and a slightly thicker sheet ~1mm thick. I use the thin sheet to form the bottom layer of the base, the one everything will be stuck to and will eventually be the part that sits on top of the standard black plastic base. The thicker sheets I use to detail the base and end up being the visible surface that the model attaches to.
Here’s my circle cutter and a circle cut out of 0.5mm plasticard.
The thicker disc that will become the surface of the base was given a quick rub with some fine sand paper. Just enough to take the shine off the plasticard. This is so that the final base looks like it has texture to it, rather than the perfectly smooth and shiny finish of the plasticard.
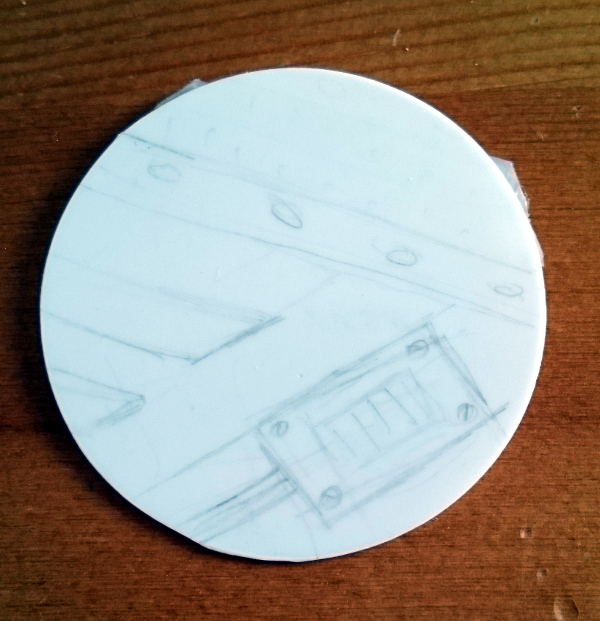
It is always good to have a general idea of how you want the base to end up looking. I draw out a rough plan, using a pencil, of what I want the base to end up looking like, and drawing where I think the details should go on either/both of the discs. From here on you can add details to the circles and build up the detail of the base.
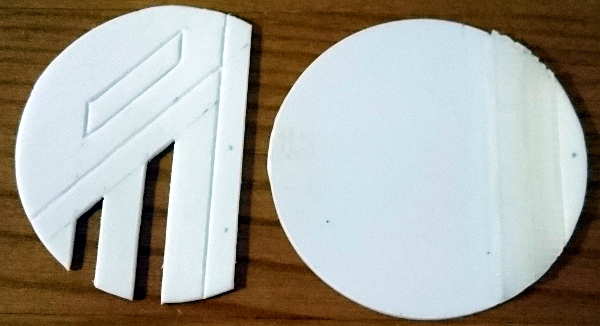
You cant see this very well but the right hand circle below has cable ties glued to it and trimmed to match the profile of the disc. Like an idiot I managed to glue these to the wrong side of the disc (the pencil drawn plan is on the other side of the disc).
I drew a slightly modified plan in pencil on the 1mm disc (left hand side) and starting cutting and scoring along those lines in the plastic to start making the detail of the base.
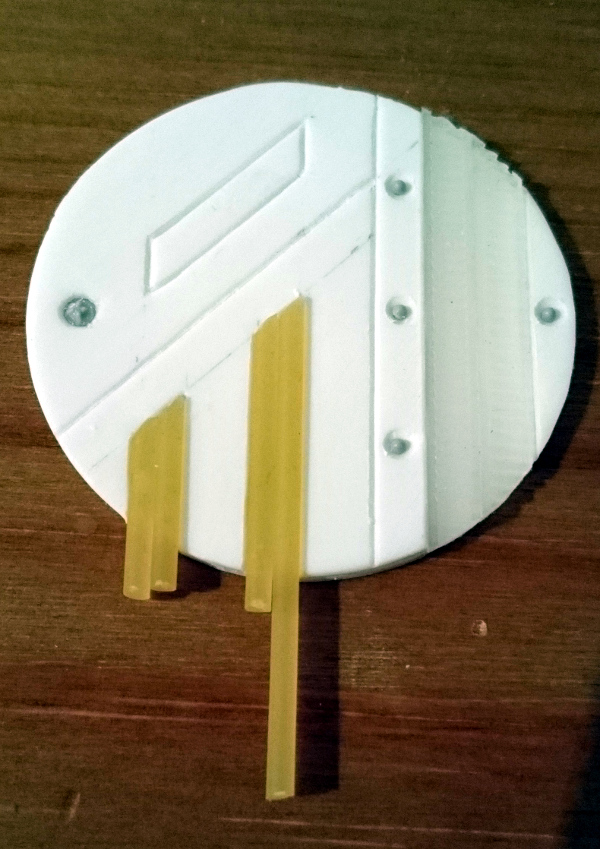
You can see how the detail of the surface is starting to build up. You can cut multiple layers to create more 3D surface. Use different thicknesses of sheets and patterns to build up lots of texture, or just score lines into the surface and have a flat 2D surface. In the base below I drilled holes and filled them with different surface details to represent sunken lights. They could just as easily represent fastenings like rivets, or power couplings. It really depends how you end up painting them in the end.

Over the years I have used lots of different unorthodox materials, in this case I am using some spaghetti (uncooked) cut to size to fill the channels I had left in the surface.
Once the spaghetti was cut to size I had finished detailing the base. So the final job to do was to green stuff any gaps, primarily around the edge of the base to smooth the join between the two discs of plasticard.

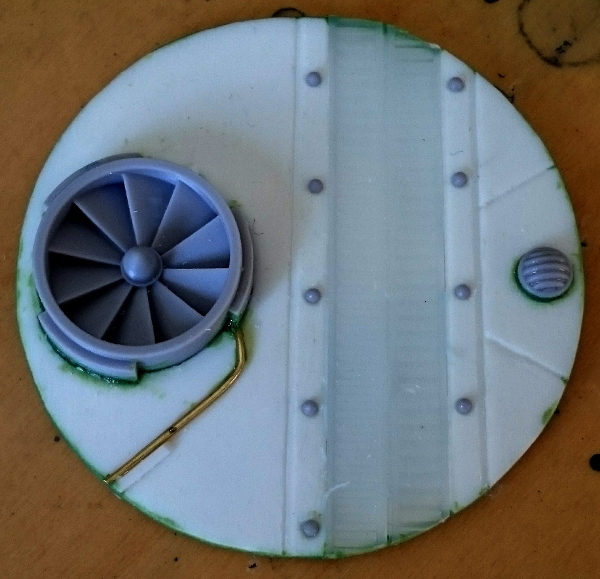
Here is the finished base topper sat on top of the black standard base.

That’s all there is to it, simple really. It doesn’t look bad for being such a simple base.
There are loads of thing you can do with a base, and many different materials you can use too. The other bases I have made for my Infinity models have used some of the following:
- Plastic rod/tube.
- Brass rod/tube.
- Electrical wire.
- Plasticard strip.
- Embossed plasticard sheets.
- Along with details from my favourite custom accessories supplier; Zinge Industies.
OK, OK, the guys who run Zinge Industries are members of the gaming club I play at but they do produce seriously good resin bits. Go check out their Scenery Accessories, Flexible Resin, and Forest Sprues. This is where the fans, grills, vents, the rivets and fasteners and some of the other interesting details came from that can be seen on the bases below.
At the time of writing I have 8 different bases. I have two 40mm bases, one of which is shown above, and six 25mm bases.
The 40mm base that the Pathfinder is mounted on, uses cable ties, Zinge fans, Zinge rivet forest sprue, and Zinge surface details.
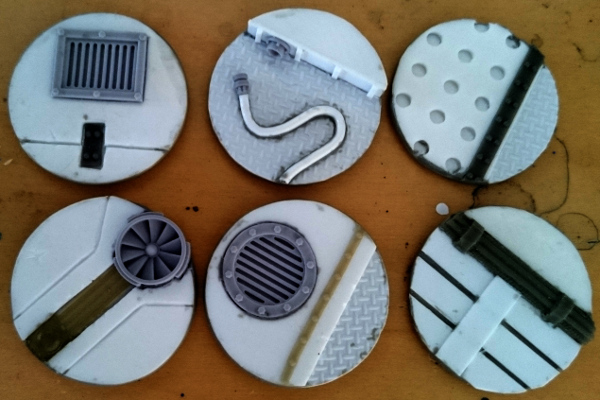
The six 25mm base toppers use some diamond plate embossed plastic sheet (guessing HO scale), electrical wire, some plastic strip of various sizes, Zinge grills, Zinge flexi resin pipes and fittings, Zinge flexi resin power cables, Zinge power connectors, and Zinge flexi resin rivets.
Hope that helps give you some ideas for making bases of your own. I have plans to make at least one 55mm base for a T.A.G. and maybe one or two more 40mm bases, along with another four 25mm bases. I like variety in my bases even in a low model count game like Infinity. Although in addition to basing the rest of my Panoceania, I suspect I’ll be using these bases for the Nomads from Operation Icestrom and the new USAriadna Army Pack. Hence I really want a good selection of different bases.
Here are my painted examples of some of the above bases:

Pingback: Basing my Infinity: Part 2 | Splayed Paint Brush
Pingback: Basing my Infinity: Part 3 | Splayed Paint Brush
Pingback: Joe “Scarface” Turner | Splayed Paint Brush
Pingback: Infinity: Panoceania ORC Trooper with HMG conversion | Splayed Paint Brush