After posting my Pathfinder Dronbot up on-line, I got a lot of positive comments about the base it is mounted on. I figured I would do a small series of articles about how I go about making the bases for my Infinity models. This is the second of 3 intended posts talking about my Infinity base toppers.
- “Basing my Infinity: Part 1“
- Casting my bases.
- Painting bases. “Basing my Infinity: Part 3“
Hopefully I’ll show you how I went about creating the bases that I am using on my Panoceania models.

This is the base I had ended up with at the end of the first article:

In this article I will explain how I went about making a simple silicone mould of the base so I could cast a number of copies of the base in resin.
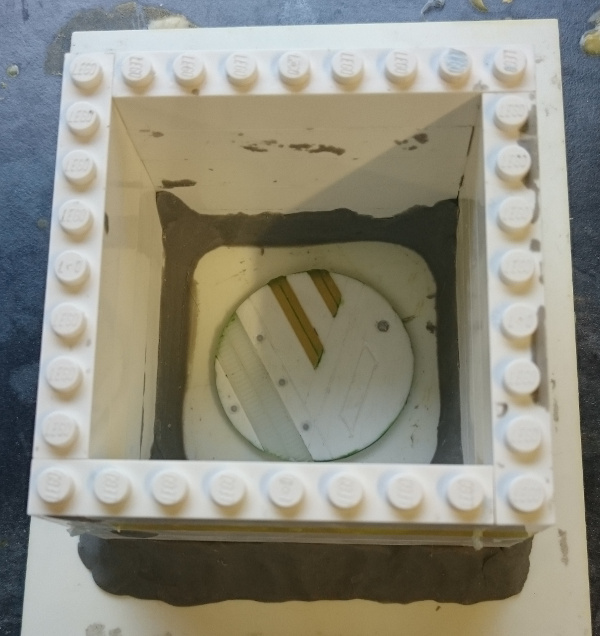
First step to do this was to mount the base on some flat sheet material. I used a thick piece of plastic card, and I stuck the base down with plasticine, as it makes the base easy to get off the plasticard afterwards.

Hmmm, probably a waste of time showing you that photo 🙂
Next I used Lego to make a mould box. I built a square to surround the base with. I then used some more plasticine to hold the Lego in place, and smoothed a thin sausage of plasticine around the inside of the Lego square to seal the sides of the mould box to hold the silicone. It is easier to seal the inside of the mould box while it only has low sides, so to complete the mould box I built up the Lego walls.
The mould box is now ready for pouring the silicone.
I use this silicone: TOMPS Value RTV Silicone Kit. I haven’t had any trouble with it. Just mix it up as per the instructions and Bob’s your uncle so to speak.
I use digital scales to weight out the silicone into a mixing jug, and a pipet to measure the catalyst. The instructions are to mix at 1:20 by mass, however I am technically using 1ml of catalyst for every 20g of silicone.
EDIT: oops after checking the website I have been mixing it wrong, should be 3g catalyst for 100g silicone. Still works though! Although I have probably had less pot life, I have not noticed it. Lesson here folks: always read the instructions!

You should mix it carefully to try and minimise the amount of air bubbles you induce into the mix. Air bubbles can really ruin both a mould and a cast. I degass (as best I can) my silicone when I pour it into the mould to remove as much air as possible.

My degassing rig used to consist of a second hand pressure pot and a vacuum pump. However I recently had an incident with that which has taken it out of operation. So I had to use my home made degassing rig that I used when I first started messing about with mould making and casting back in 2012. My first rig consists of a hand vacuum pump attached to a large food storage tub. It does an adequate job, but is time consuming and takes a lot of effort (it also has a crack in the lid if you’re wondering what the plasticine is for on the lid).

Leave it on a level surface for about 24hrs and it’ll be ready to use. Remove the Lego and remove the base from the mould.
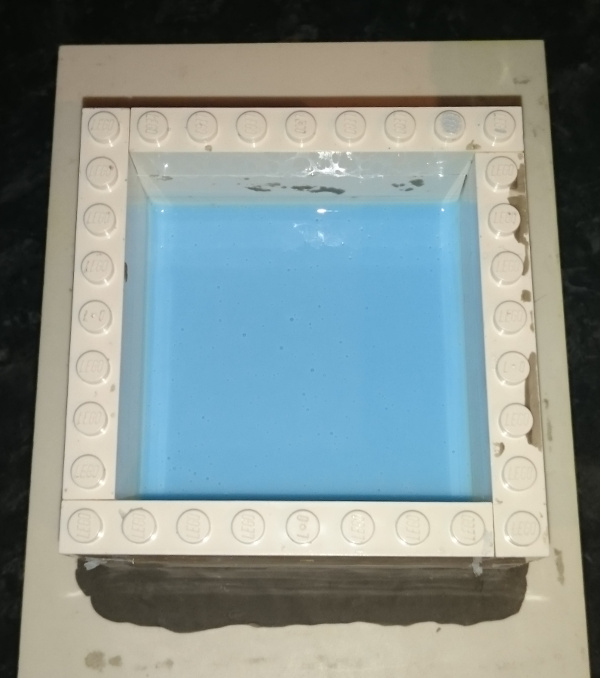
Looking at the above picture, you can make out tiny bubbles left in the surface of the silicone. I didn’t have that problem with the pressure pot and vacuum pump system I just ruined 😦 but anyway onto the casting…
I have been using fast cast polyurethane resin, again from TOMPS, currently the F19 version, but I actually prefer the F18 and will order that again when I have used up this batch of resin.
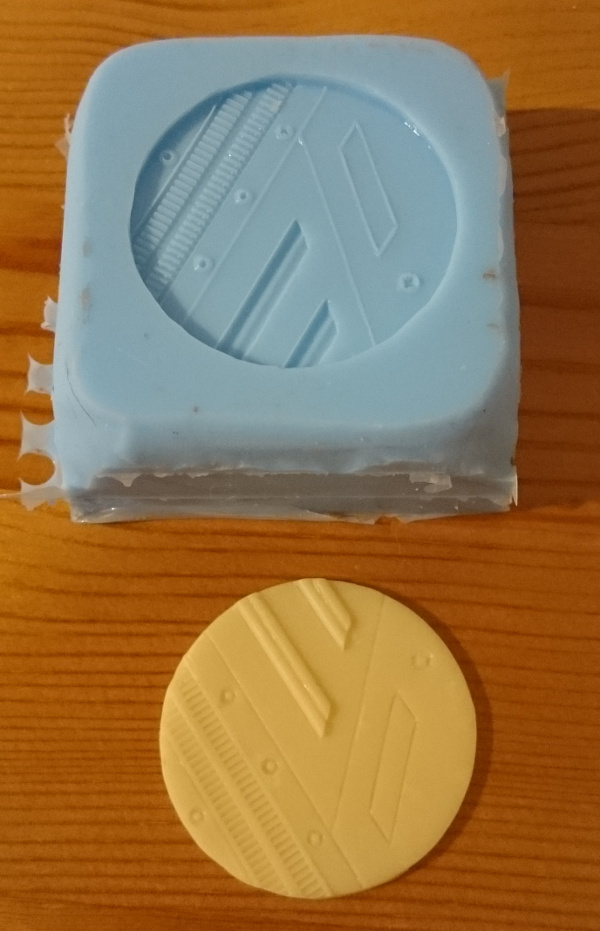
I mixed up the resin in a disposable plastic cup, measuring the quantities of the 2 part mix using digital scales. Be careful not to stir in too much air when mixing the resin. I then carefully poured a little into the mould and flexed the mould and pushed the resin with a short piece of plasticard so that all the crevices in the mould were filled to reduce the chance of an air bubble in the resin. I don’t spend a lot of time doing this as the resin goes off quickly, but the few seconds it takes is well worth it.
Here is the final result; the mould and the first cast resin base topper.

Pingback: Basing my Infinity: Part 1 | Splayed Paint Brush
Pingback: Basing my Infinity: Part 3 | Splayed Paint Brush