Its the beginning of September, so obviously this is where I tell you all about the massive success in completing the month 1 pledge of my #ATClashOfTheTitans challenge, by Battlebling Store and Maximal Fire Podcast.
…
Well…yes, about that, I’m a little behind with my pledge to complete my Warbringer. However, check out what distracted me!
I’ve been subscribed to Grimdark Terrain since January this year when Rudolf aka Broncofish started up his GDT subscription service. The terrain, and now vehicles, he has produced are really great, and keep getting better. You need to check out the September release as it has blown my mind (a sample build). It harkens back to the old Epic 40k plastic ruins sprue, but turned up to 11 (and then some).
GDT’s Aeolus range is themed around an airfield, and from the Argos bunker range you can build a very cool Air Traffic Control tower. Check out this sweet art work from GDT showcasing what you can do.

It is the ATC tower that I have been messing with. On the GDT Discord server a comment was made about making the radar antennae rotate, and Broncofish responded by joking he’d love to see someone do that with his terrain…how could I not oblige!
It’s classified. I could tell you, but then I’d have to kill you.
The plan then was to simply add a motor to the tower’s antennae, trying to create something like this (the stuff that gets put on YouTube eh!). Adding motors to models isn’t new, there are loads of examples on the net. Many years ago I motorised the assault cannon on a plastic Space Marine Dreadnought and the twin linked assault cannon on a Landraider Crusader. The dread in particular was funny, as it’d vibrate across the table. But a mobile phone’s vibration motor spinning at 10,000rpm will do that – its what it is designed for after all. What was needed for the radar antennae is something rotating much much slower. You can buy DC electric motors with a reduction gearbox attached for less than a fiver, probably much less if you shop around more (I literary bought the first hit on ebay). They reduce the rpm of the motor quite a lot, to some where in the region of 60rpm, which is pretty much what I wanted for my ATC tower.
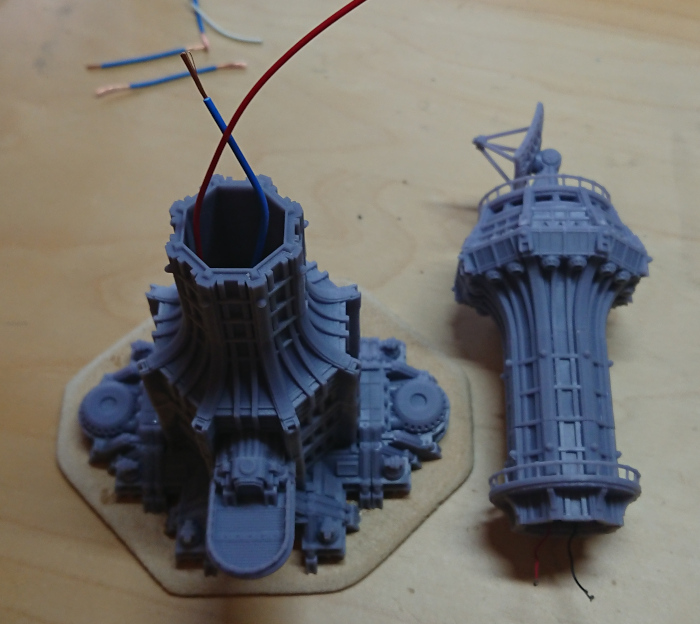
All I needed to do was be able to mount the motor inside the tower under the dish, and then mount the dish to the motor’s shaft. Hide the batteries in the base and away we go.
I Feel The Need The Need For…. Printing
The tower was built using a number of GDT components, see the list below. These are simple to print out as the GDT files come both unsupported and supported (these have themselves been test printed before release). Broncofish has just had a massive reorganisation of all the GDT parts, which has made it super easy to reference any component, and even provide renders of each part – unfortunately there are still some renders that need updating to the new format, so the slideshow below may be missing some of the renders. There are hints of a ‘BOM builder’ coming to the GDT website in the future (that is ‘Bill of Materials’ for non-manufacturing industry folks – a parts list).
- 1x AG-002 Argos – Balcony
- 1x AG-005 Argos – Experimental Tech Topping
- 1x AG-017 Argos – Mega Bunker Access Floor 1E
- 1x AG-027 Argos – Mega Bunker Garage Door
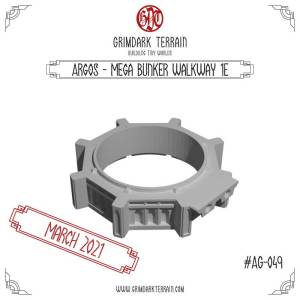
- 1x AG-049 Argos – Mega Bunker Walkway 1E
- 1x AG-053 Argos – Mega Bunker X
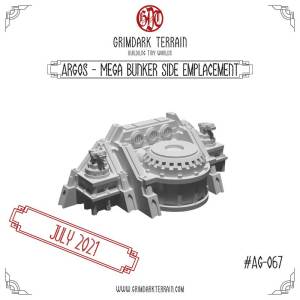
- 2x AG-067 Argos – Mega Bunker Side Emplacement
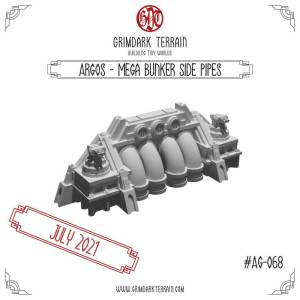
- 1x AG-068 Argos – Mega Bunker Side Pipes
- 1x AG-070 Argos – Air Control Tower Base
- 2x AG-071 Argos – Air Control Tower Level
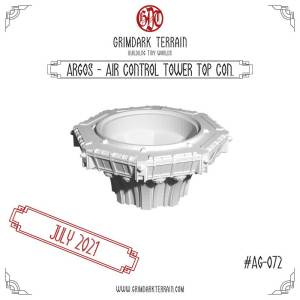
- 1x AG-072 Argos – Air Control Tower Top Connector
- 1x AG-073 Argos – Air Control Tower Circular Balcony
- 1x AG-074 Argos – Large Communication Dish
- 2x MT-004 Mytilene – Tech Emplacements Dish


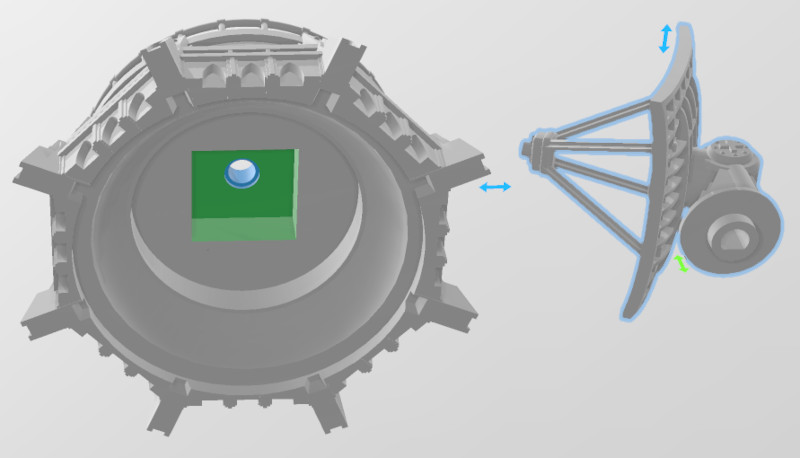
The easy part of this build was modifying the digital models to take the motor. After I’d ordered the motor, and found some dimensions online for it, I modified part AG to take the motor’s drive shaft, and AG to house the motor underneath the dish’s mounting point. This was done using Windows 3D Builder. I simply created a basic shape for the motor, gearbox, and shaft. Located it centrally in the various parts and subtracted the shape from the GDT part.
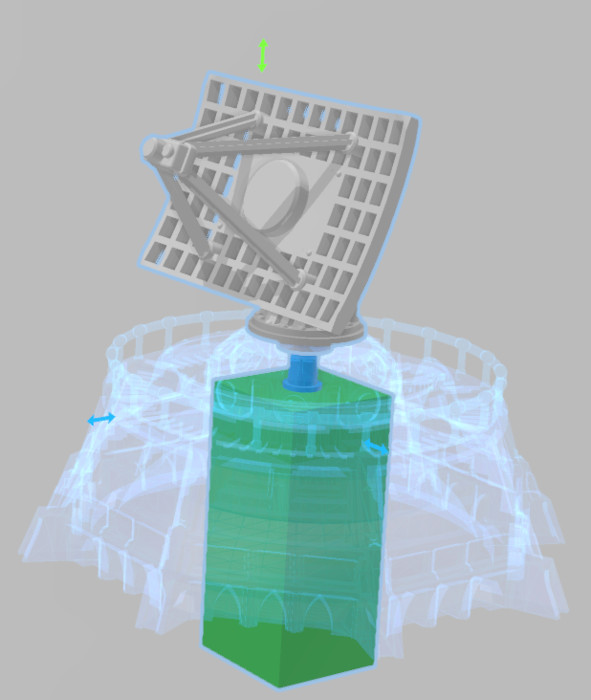
3D printing is all about the ability to create rapid prototypes. The motor hadn’t even arrived before my parts were designed, printed, and cured. I had overestimated the depth required for the motor, so my prototype required shimming of the motor under the dish mount, but I’ve corrected that in my digital file now – if I ever need it again.
My modified files have been shared on the GDT Discord server’s Derivatives channel for other subscribers to use if they wish. “Deriv_AG-005-ModdedRotaingDishMount_v2.stl” and ” Deriv_AG-074-ModdedRotatingDish.stl“.
Mounting the motor I used a little superglue – sparingly as I didn’t want to accidently bind the gearbox – on the front plate of the gearbox. I then used some blobs of greenstuff to further secure the corners which clamp the gearbox together again avoiding binding the gears. <I think I accidentally deleted the picture to go with this description…sorry>
The antennae is pretty much a perfect fit, it just slots on to the shaft with no need for any glue. Which is really handy for painting it up later on.
Lets Turn And Burn
The hard part, which surprised me, was getting the motor running in the first place. I think the friction of the gearbox must require some oomph to get turning, as my intended 3v battery (which should result in 30rpm) didn’t run the motor. After messing around for a bit I managed to get the motor running fine. I actually got it going using the mains adapter for my curing station (12v DC), that made it really go, but battery wise for my testing I ended up using three 3v coin batteries. After a bit more messing around it dawned on my to oil to gearbox! (what kind of engineer am I not to think of that sooner – hangs head in shame). I put a drop of 3in1 oil onto the gearbox cogs and that made a real difference – do this before mounting it place, because it made a real mess inside AG-005.
Naturally I needed to find out if the dish would actually rotate once the motor was glued in place The video below was the trail fit and testing of the motor. I was holding three 3v coin batteries here to power the antennae, and I’m getting about 30rpm which is about perfect. However I still wasn’t 100% happy with the performance, and I put this down to the batteries powering the motor.
After rummaging in my bits box and not finding exactly what I wanted I ended up ordering some 9v battery holders, slide switches, variable resistors (Amazon same day delivery dictated what I bought here), but in my bits box I did find some flashing LEDs – light bulb moment!
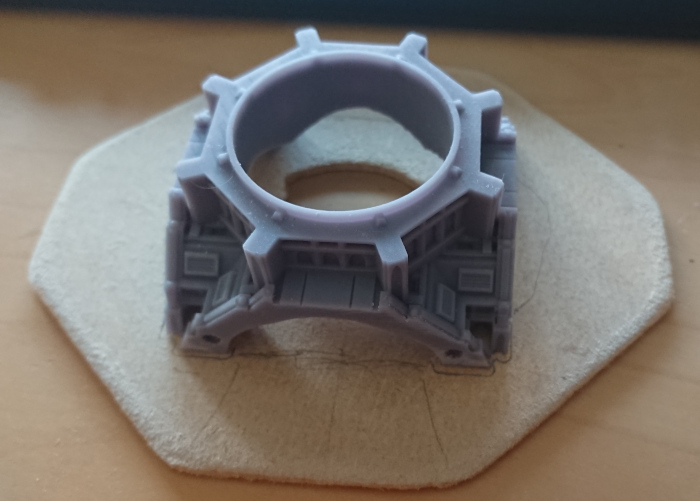
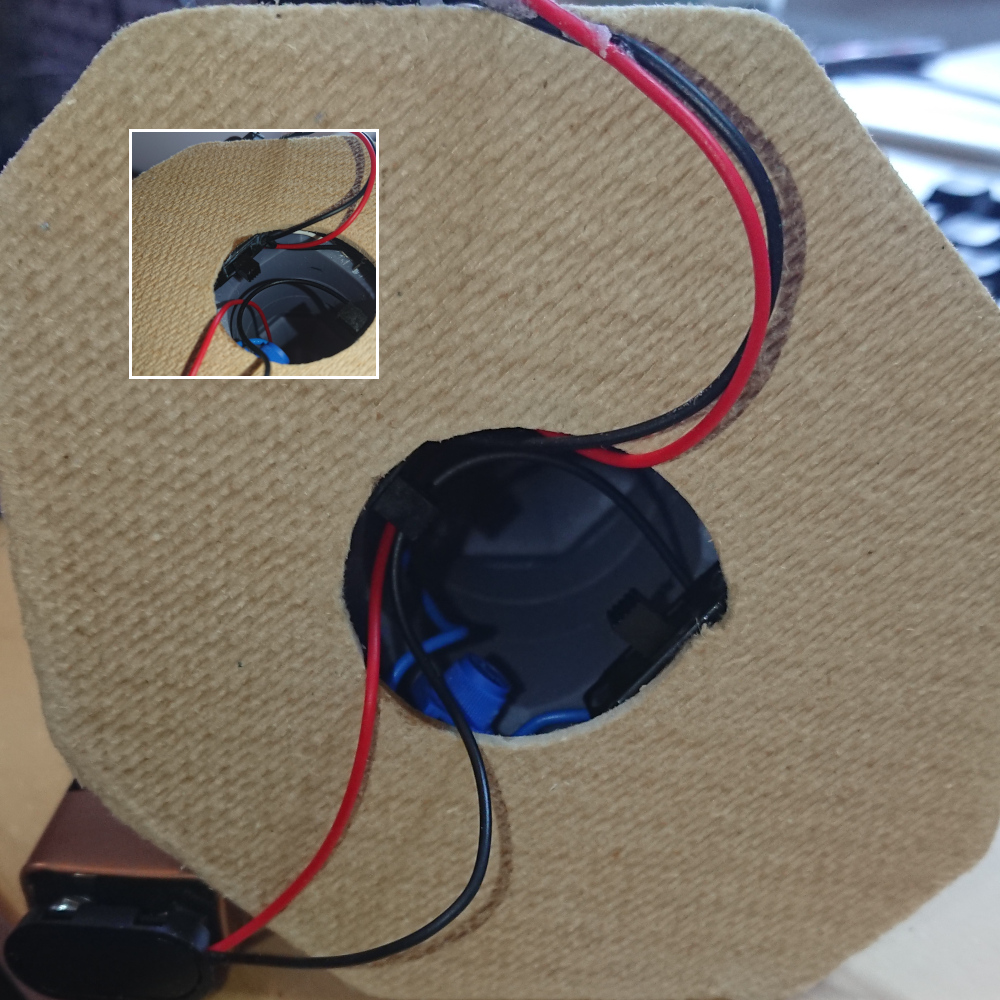
Before I could really start building, I needed a base to stand it on. This was simply a piece of hardboard, that I’d cut a little larger than the resin parts making up the ground floor. I then sanded the edges smooth, and rounded them off. I cut a hole in the centre to allow access to the switch and battery from underneath the tower.
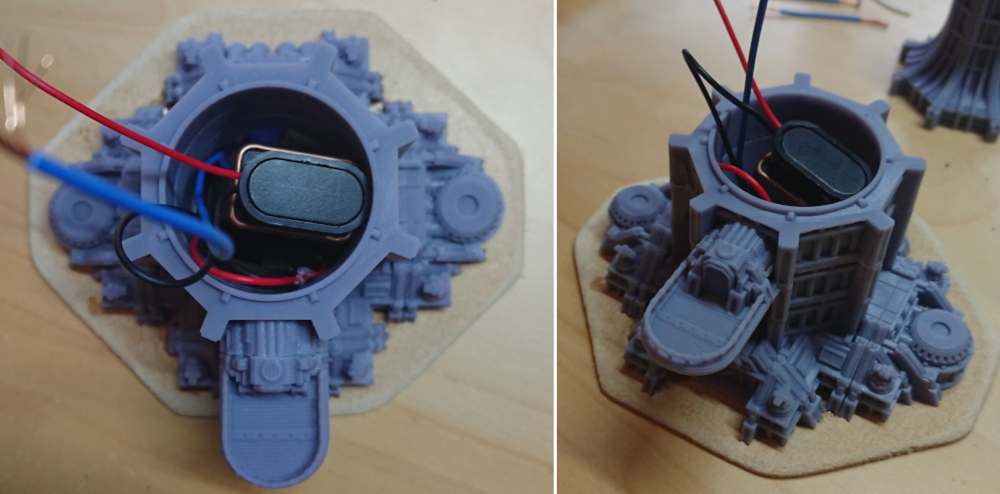
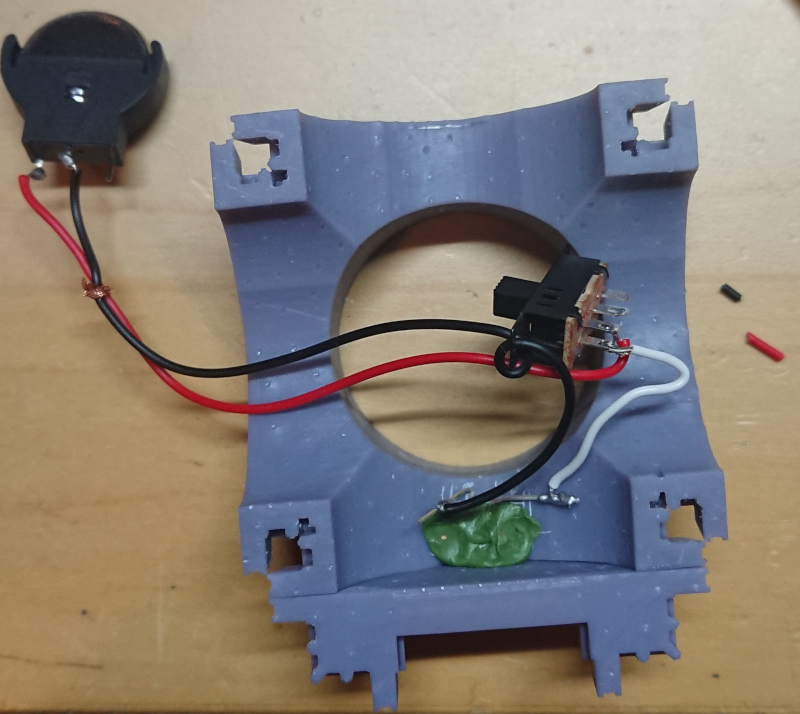
Next up was wiring it up properly, here I test fit the circuitry as best I could to ensure it worked, before then gradually test fitting the circuit inside the tower as I built it up (also a dry fit of smaller glued subassembled sections of tower). The first hitch I found was that the 9v battery was much bigger than I had originally planned for, which was to just seat AG-070 on top of AG-053.

So I had to add a couple more layers to the ground floor mega bunker, in this case it gave me the perfect opportunity to use the viewing balcony parts. As you can see its a cramped space in there once the 9v is in.
Remember those flashing LEDs I found, well I tried to get those to run off the 9v power supply in series with the motor. I used some resistors I’d found to try and protect the LED from being cooked by the 9v supply. With the resistor they wouldn’t run, without the resistors I burnt them out. I lost two LEDs to this experiment. Instead of sitting down and working this out, I just decided to use one of the coin batteries I was using earlier. I had holders for those already in the bits box. So after deciding that I just wanted to create a red flashing light over the tower’s ground floor entrance. I then needed to mount the LED above the door. To do this I drilled carefully from the back of the AG-027 part so I didn’t break out the detailed face side. I had guessed pretty much exactly where I needed to be. Now I just crudely enlarged the hole to seat the LED. From the font the hole is quite small. I also needed to remove some material from the underside of AG-053.

Again, there was another round of dry fitting circuitry into the tower build before any real assembly took place. Then it was time to start piecing the parts together. Before the ground floor could be assembled I need to mount the LED in place. I did this with a blob of greenstuff, and soldered the LED circuit in as well.
<I have forgotten to take photos of the dish’s motor circuit being built into the tower – sorry again>
Have a shoddy circuit diagram instead…

I anticipated that the 9v battery could turn the motor’s driveshaft pretty rapidly so I got the variable resistor to allow me to slow it down. I haven’t got the correct Ohms VR here, as there is very little play in speed adjustment before stopping the motor completely. However, there is enough it is just very sensitive, but the idea was to dial in the speed and never touch it again. So with the circuit working I started building the tower up over the electrical components. The switches and the VR were glued to the hardboard base and the Megabunker over the top. Remembering to feed the wires through, as appropriate, as the tower got taller, until I got to the last joint. Here I soldered the wires together wrapping the joints in electrical tape so there wasn’t an accidental short up inside the tower. As the next step was to glue the two tower subassemblies together completing the whole tower.
Looking up underneath you can see there isn’t much room inside, while still having access to the two slide switches, the variable resistor (just in case needed) and of course to change the batteries. I have actually left the batteries just pushed up inside the tower. The stiffness of the wires, and the close fit seems to hold them in place well enough. Image below with the batteries out to show the insides as much as possible as I forgot to take pics before this point.
I decided on having two smaller dishes MT-004 on the side emplacements AG-067, but just in case I change my mind in the future, they are magnetised with 2x1mm magnets. Holes were drilled oversize at 2.2mm, as I couldn’t find the 2mm drill bit. This means the magnets were held in place with greenstuff and superglue.

Your Ego Is Writing Checks Your Body Can’t Cash
The tower was now fully assembled, and time for the grand switch on. The LED blinking away merrily, but the dish… well the dish didn’t turn! Panic set in here, I’d checked at every step, or so I had thought, to make sure everything still worked during assembly. There is not much room inside the tower to work, and there is no way I wanted to break the tower apart to get inside. I could only assume that either I had broken one of the circuits joints during assembly of fired a component. With the help of a second battery holder, I manged to test parts of the circuit and work out the variable resistor was no longer working. I pulled out the resistor and the switch from the hardboard they were glued to, and replaced the VR. Fortunately this worked, but I wasn’t able to glue the VR back in place, so its now pushed inside the bunker as best as I could. Of course I have really just bodged this together, there are poorly soldered joints, exposed wires, and parts just hanging off their wires. Not good practice, maybe next time I’ll look at mounting the various components to a PCB/breadboard or something – don’t know much about those though.
Its Time To Buzz The Tower
Here is the assembled and working tower, it is just waiting for something like a Samson Freighter to fly by and land on a pad (mine is yet to be printed, but I do have something in mind).
Do you think that motor whine is going to get old fast on the tabletop? Yeah, me too, sadly.
Next up is painting the tower. But that’ll be another blog post – I’m too excited to get this post published.
Thanks for reading, if you feel like supporting the blog, then you can while treating yourself to hobby stuff at the same time. Click Element Games, Goblin Games, or The Outpost, affiliate links, buy some hobby product and I’ll get a little commission. This helps to pay the WordPress fees etc.
I have no affiliation with Grimdark Terrain, but if you have a 3D Printer and fancy some Adeptus Titanicus scaled terrain (or even 40k, people have scaled some parts up ~400%) then I highly recommend the subscription. If you don’t have a printer then GDT is available from licenced manufacturers, info available here.

Pingback: New Year, New Hobby | Splayed Paint Brush