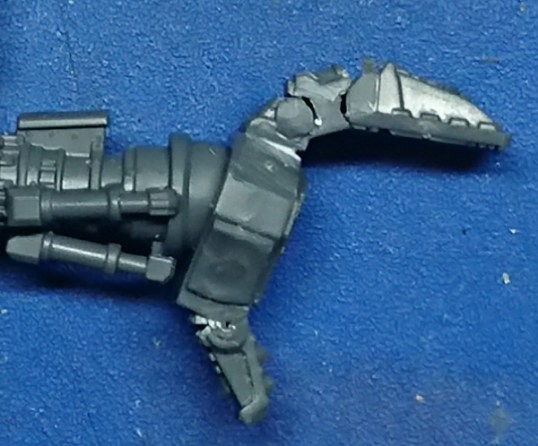
Following on from my last post, where I straightened out a Warhound Titan’s leg, I wanted to adjust the position of the foot along with the other leg. I had part of a plan of how to go about it in mind, but this process was still fairly experimental. Here’s what I did…
I cut up one toe/claw, to see if the method would work, no point in ruining more than one at first 😉 I cut the whole claw off the foot and then working from the end closest to the join with the foot cut each hinge point. I ended up with the pieces below.
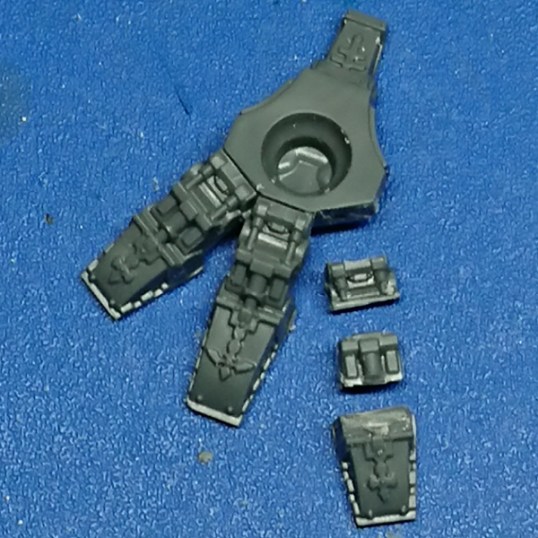
Once I was happy with my method, I removed the opposite claw from the foot. I left the middle claw attached for two reasons;
- It is a lot easier to hold while cutting.
- Less cuts to go wrong, and joints to glue back together
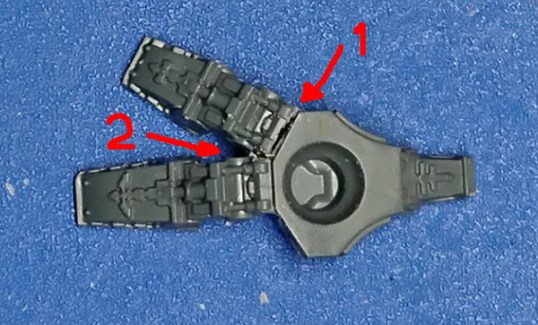
Cutting the claws off was easy. Just cut from the outside edge of the
claw at the joint to the foot (1). Then just a little cut is needed between the claws to free them from the whole foot (2).
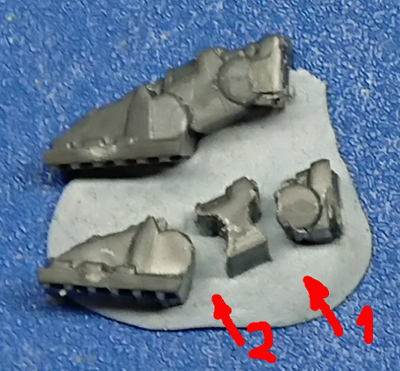
I used a jewellery saw to cut around the barrel of each hinge. Here is a side on view of the cut up claw and an uncut claw for comparison. I held the claw and did the cuts in the order shown. I don’t think I’d have been able to hold the smaller pieces otherwise.
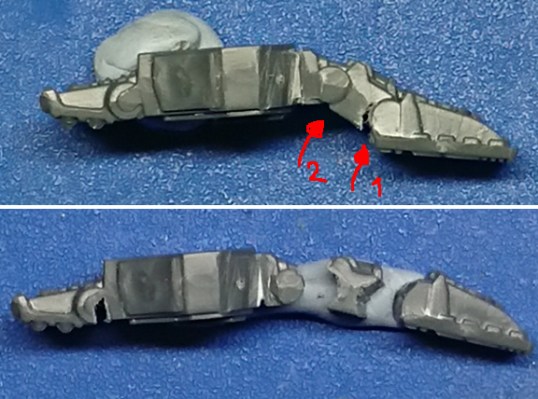
With the outer claws cut up I moved on to the middle toe that was still attached to the foot. The images below show the cuts, also note that the cutting order is reversed too. It is much easier to hold the foot than the toe while cutting. Now I realise you may be thinking, why didn’t you just cut a notch in the back of the joint and bend the toe. Well I could have, but I wanted to experiment. However to keep you all happy I did exactly that on the trailing rear claw (I suppose it’ll have a more anatomically correct name, carpel bone? dew claw? – the one at the back).
The next stage was gluing back together. After a bit of dry fitting, filing, and more dry fitting, to make sure I got the positioning I was trying to achieve, I glued the central claw together. Happy with this claw I then did the same for the outer claws, but did not glue them in place on the foot just yet.
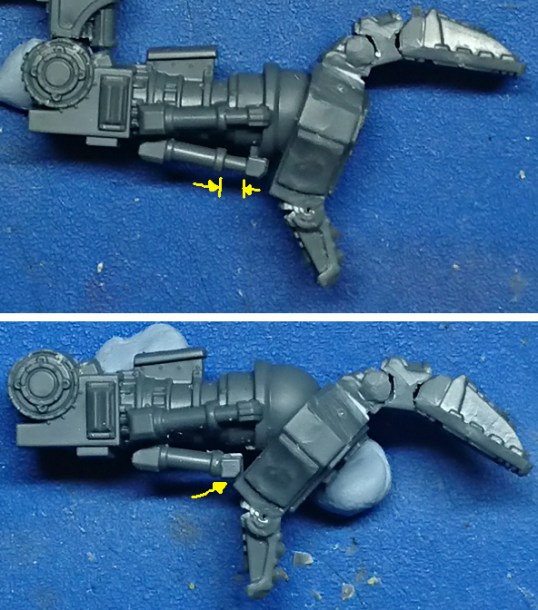
I turned my attention to the leg at this point. I wanted to raise this foot up as high as the leg would allow me to. The leg that I choose of the 4 that come in the Warhound kit had the upper leg already fully retracted to ~90deg. So all I had to do was cut the lower leg joint as I did in the previous post. I cut between the knee joint and the armour plate from the back to the front (red arrow below). A little bit of trimming away plastic was needed on the front of the leg (yellow arrow). With this done I could adjust the leg to the angle I wanted, remember there is an armour plate to fit on the font of the shin.

While dry fitting the foot to the leg I realised that I wanted the foot to angle forwards more than the model allowed. I did toy with changing the whole of the ball joint on the leg. However I did want to get the job done and so decided to keep it simple for a change. To do this I cut a section of the rear actuator away (yellow marks below) and glued the end of the actuator to the cylinder. This allowed the foot to swing forward more rotated on the ankle ball joint and resting on the end of the rear actuator of the foot (second yellow arrow).
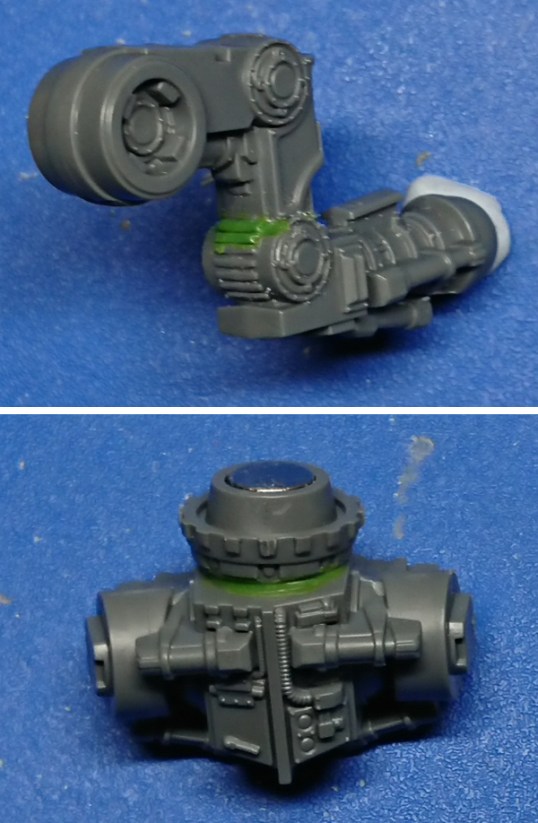
I had some sculpting to do to cover up the cut surfaces. The top of the lower knee joint had some ribs sculpted on to match the detail already present. I also tilted the waist of the Warhound a little to help with its stance, and filled the gap with greenstuff.
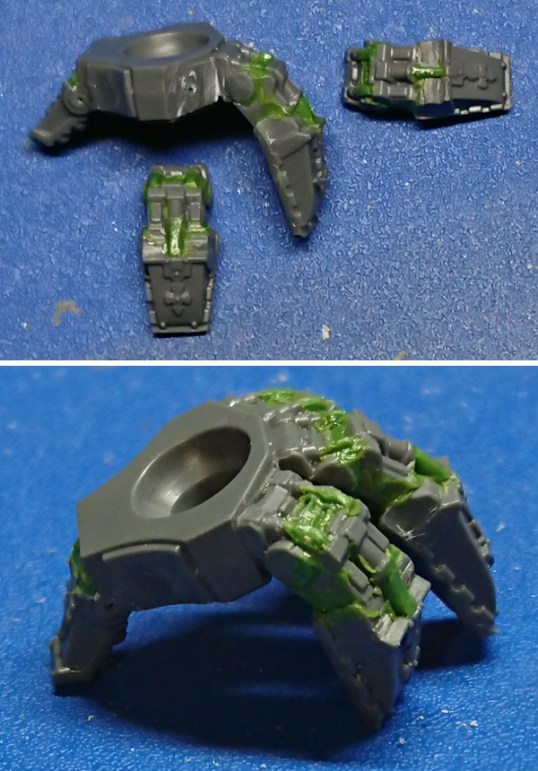
Finally i tried to tidy up the joints on the claws, filling gaps, attempting to smooth out cut surfaces, and replacing lost detail on the claws. Once all the greenstuff had cured I glued the claws in place.
Here are the finished legs (albeit naked of armour) for the Warhound, in what I see as a running/striding over an obstruction stance. Once I get some decent pictures taken of the titan on its base I’m hoping that will become clear.
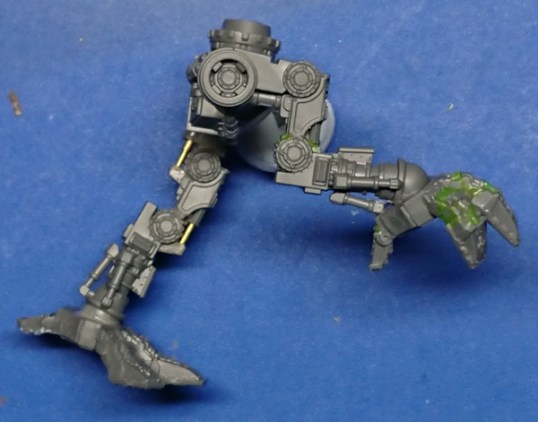
This post has been about the raised leading foot and leg, the trailing foot is an unaltered stock model part. The straightened trailing leg was covered in this earlier post. Hopefully my next article will have the titans fully assembled on their bases – most likely not painted though.
