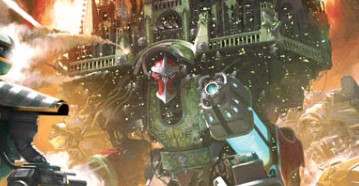
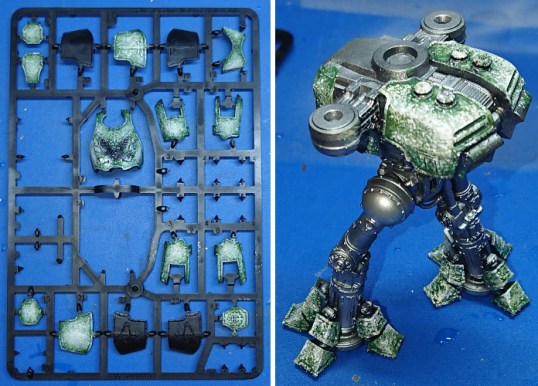
I have been inspired by some nicely painted Legio Gryphonicus titans, that have stayed true or paid homage to the original grey mottled armour appearance. I fancied having a go at producing something similar, but not for the War Griffins. I had spied some artwork for the Legio Solaria which showed them in mottled green armour. Their appearance has been brought up to date recently at WarhammerWorld too. This post is my take on painting the Imperial Hunter’s mottled green armour.
A Creature Of Habit…
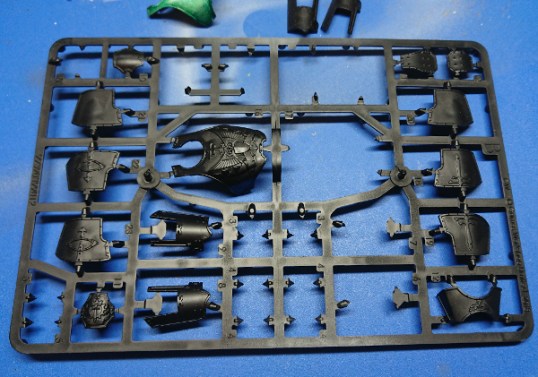
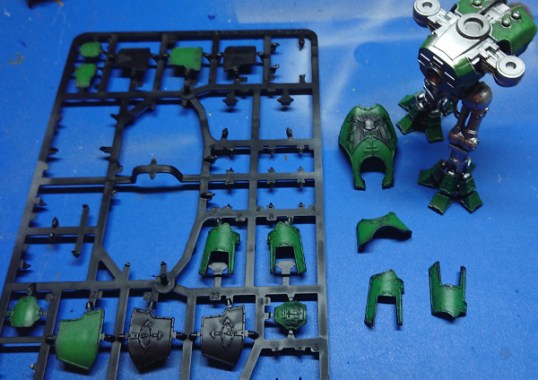
The Reaver had been assembled, but most of the armour plates were left on the sprue. This sprue was sprayed with AP Black undercoat. I didn’t choose black for any particular reason, I didn’t really give it much thought. The Reaver was mostly assembled, and had been painted silver, but I’d left nearly all the armour on the sprue.
Green 1
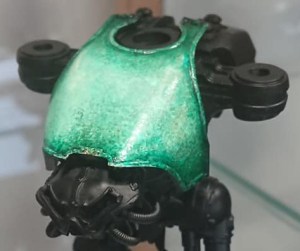
The armour plates were then base coated P3 Gnarls Green.

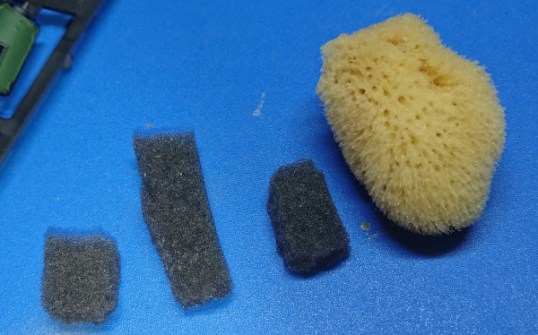
The next steps use a sponge to apply the paint to give a mottled pattern effect. I bought some natural sponge from the Range, for about £3. I realise that most blister packs of models have free foam in them, but I happened to find these, and thought that the different textures of the natural sponge might lend itself to a more natural looking mottling. Here is a picture of some ripped up blister pack foam and the natural sponge.
Green 2
The first colour to be applied using the sponge was P3 Iosan Green. I mixed the paint with a little water to thin it down a bit. There is a happy medium to achieve with how thin the paint is and how much paint you have on the sponge. This will take a little experimenting to get right. The picture below shows the Iosan Green applied to the leg armour.
- The right armour plate has undiluted paint on the armour, after dabbing some of the paint off the sponge. It leaves a rough texture to the surface.
- The left hand side of the left armour plate uses diluted paint, but not enough removed from the sponge. So the paint has pooled a lot, this will be no good for later colours which need to cover less area.
- The right hand side of the left armour plate has had some of the paint removed on a paper towel. This has left a nice mottled paint pattern, and as the paint is fairly thin it has not left a rough texture. This is what I was going for, but I found it hard to consistently achieve this across the model for each colour used.
Applying the paint with sponge to the paints on the sprue was very easy if they were relatively flat. However the highly curved parts were a little more problematic so I removed the carapace and chest plate from the sprue. The armour plates already on the model were easy to do, although during the later steps I found it hard to target the exact areas I wanted of the smaller pieces, the leg pistons’ armour, and toes.
Green 3
The second colour applied was Goblin Green* (yes, the original Goblin Green prolific across bases in the early ’90s – dakka paint chart suggests Warboss Green is its modern day equivalent). The idea here was to paint less area than the previous Iosan Green, and start to highlight edges or raised areas – depending how the plate would catch the light when attached to the model.
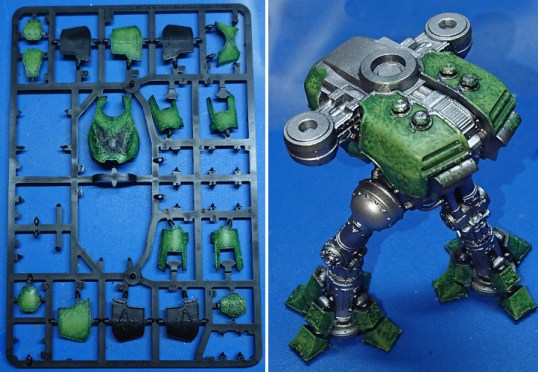
Green 4
The third colour was P3 Thrall Flesh, as with the previous green I am trying to put less paint on the model. To add definition to the shape of the armour, and still allow some of the previous colours to show through.
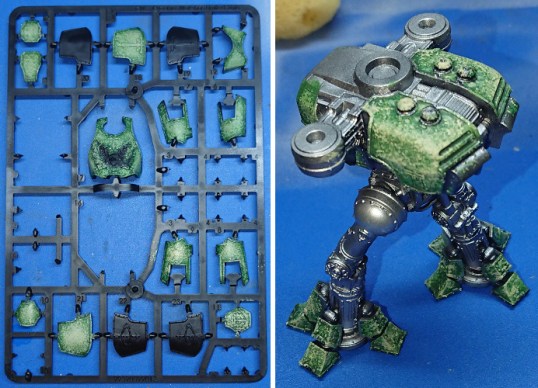
Green 5, err not really green
The forth colour was P3 Menoth White Highlight, we are getting to much lighter colours now, so I am really trying to limit/target specific areas of the armour. Hard edges, and highly curved regions that would catch the light, and mid panel of the flatter armour plates.
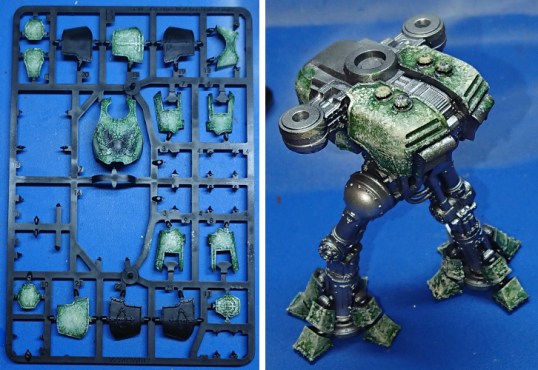
Green 6 White!
The fifth colour added was White (I used VMA White, as it was close to hand). Again I tried to be very specific where this was added.
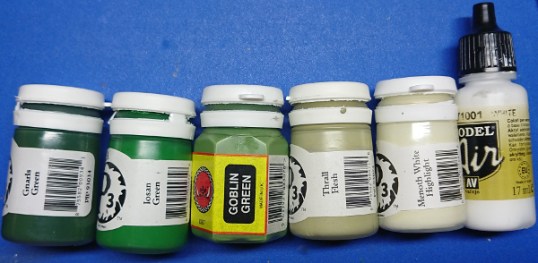
All the acrylic paints used:
Varnish
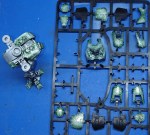
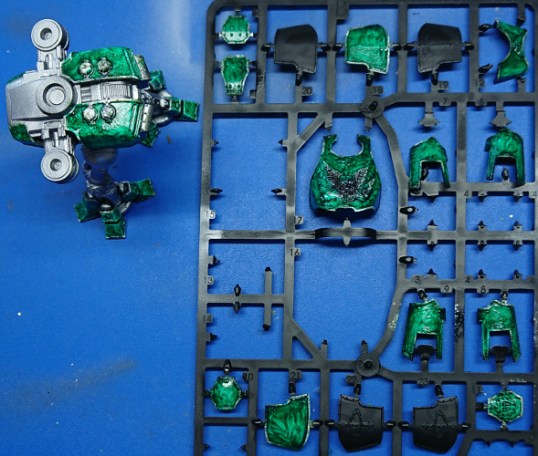
The next stage was to gloss varnish the model, I air brushed VMC Gloss Varnish (comes in small, medium, large pots) over the model. That was all the water based acrylic paints used, this seals the acrylic paint, as we are about to use oil paints, and it also helps to smooth out the painted surface a bit – mine was very rough after the 4 sponged paint stages. Here is a pic of the glossed parts, for completeness more than anything else. Its very important that you leave the varnish to fully cure, you could even do with a few coats of varnish, I gave my model two coats.
Viridian Hue
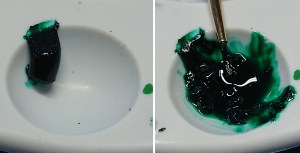
While I was buying the natural sponges from the Range, I also bought some Viridian Hue green oil paint. I’d spotted this and thought it’d be good for using with this technique and this colour scheme. I’ve used oil paints before** to add a dirty grungy look to metals, so I had some artists turpentine already; but that was also sat on the shelf in The Range (it smells less than whats probably hanging around in your garage).
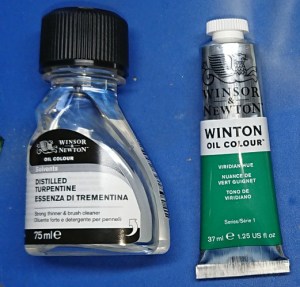
The oil paint is a thick paste, it needs thinning down with turps to use. The oil paint on the left straight from the tube. On the right being mixed with some turps into a thin usable wash.
Don’t use your good brushes, I have some cheap brushes for use only with oil paints, and never mix up which paint they are used with. Also, in case you don’t know, you clean your oil paint brush with turps not water.
Paint your thinned down oil paint over all the green mottled armour panels, and leave it to dry. As it is oil paint this will take a while. You’ll notice mine is applied quite thickly in places, and it is also not an even coverage. This doesn’t matter too much, but try not to get it too thick.
It’s A Kinda Magic
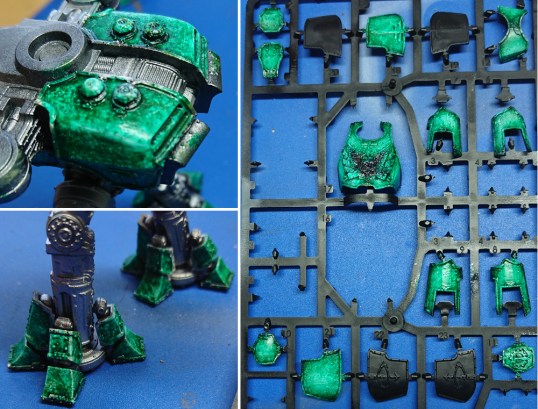
OK its not magic, but its the best bit of the process in my opinion. You simply reactivate the oil paint with solvent and wipe it off the model. You have a lot of control with how much and where you leave the oil paint allowing a significant gradient to be achieved easily. The oil paint acts as a filter/glaze tinting the layers below the varnish.
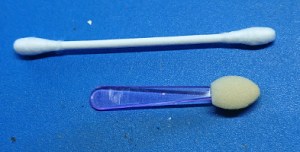
To do this you want to get hold of some make up applicators, Q-Tips/cotton wool ear buds. I prefer the make up applicator (bottom) of the two. Sometimes the cotton bud leaves strings of cotton behind, however I find the applicator can be a little abrasive at times – which is why I did a minimum two coats of varnish – I’ve seen this process remove paint right down to plastic on hard edges. I have also ruined a section of one of my Farrow models because it wasn’t varnished well enough.
You’ll notice I have a pipette on the desk, I use this to transfer the distilled turps from bottle to paint palette. I also use a brush as well as the Q-Tip and makeup applicator. Dip the Q-Tip in the turps, dry it off a bit on a paper towel and then gently wipe over the areas of armour you want to remove the oil paint from. The turps reactivates the paint, and you can pull and push it around to your heart’s content. Same with the makeup applicator and the paint brush. I start with the former, to remove a lot of paint, and finish off with the latter. You have much more refined control with the brush, I suppose you are effectively wet blending but for God’s sake don’t lick your brush! Trust Me On This!!!

Except for drying time of the varnish and the oil paint its a pretty quick process to achieve a complex looking finished appearance.
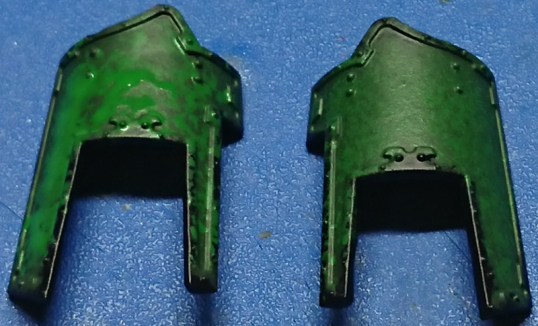
The best part is, if like me you don’t get long sustained periods of hobby time, you can leave the oil paint and pick it up later. All you do is reactivate the paint with the solvent. In fact after completing the work above I came back next day and realised that I had not got the model as pale as my original test piece. So I got the turps out again and worked the armour some more to get it lighter. In the image below I have left the first carapace above the sprue to hopefully show that I’ve reworked the oil paint to get the same hue of green as it.

Finally
Once you’ve finished titivating the oil paint, leave it to dry fully, and then seal the model with another couple of coats of varnish. I’ll try and get a fully assembled picture up soon. At the moment Christmas has paused the painting of all the armour’s edge trim.
Random Thoughts
I figured I’d shift my random thoughts to the end of the post so if you weren’t interested you can stop reading now, all the painting is over. Except as its Christmas go buy your self some models though the webstore links on the site. That way you can support the blog, as i’ll get a small commission – it helps pay for advert free hosting etc. The links to the paints I used do the same thing, but if you have your own paints already you could try looking up my colours on the Dakka paint range compatibility chart.
Natural sponge verses free blister pack foam? Well I actually used the sponge 99% of the time, the remaining 1% was me fighting with the foam (or so it felt) trying to test it out. I either dabbed on way too much paint, or none at all, no matter what I did with the paint. It was much easier to work with the sponge. There were a few places where the smaller size of the foam would have been really useful. I ended up cutting off some sponge to get a small section to use. Maybe it is just me, or how I was trying to use it, and the foam was fine but for a few quid I thought it was worthwhile.
My original intention was to paint up my titans as Warp Runners, but they seem pretty common looking around the net. So I thought I’d try something different: Imperial Hunters (although I suspect with a recent book release they’ll get more common). Before writing this article I’d just done one panel of the Reaver as a test for the mottled green armour. The article was written up on the armour plates I was intending to use on my Reaver.
If you are interested here is the inspiration for this painting experiment:
- Gary Connell’s Reaver.
- James Glendinning’s Reaver.
- Collection of Solaria inspiration.
- Not forgetting WW’s own Solaria titan dock diorama. I should probably make an effort to go WW and have a look round – I’ve been once many many many years ago.
- Its also worth having a look at Jon Sloan’s Imperial Hunters, they look nice too.
As I’ve been doing this to avoid painting my planned Titan scheme (Legio Astorum – Warp Runners), and building my Warhounds, maybe I should create my own titan legion “Legio Procrastinator”. I have a little bit of a reputation for not finishing something I start lol. This blog is testament to that really, although it was originally created to help me finish stuff off.
*In honour of the latest GW Noise Marine. Seriously after seeing that model based on its Goblin Green base I went to see if mine was still usable, as I thought it’d be good for this paint scheme. Turns out I had an old pot with a tiny bit left in, and a unopened pot still sealed. I broke the seal and used the new pot. Interestingly I have a bunch of the old Citadel Paints all still usable – with the possible exception of ‘Tin Bitz’ which was always a real shitty paint to use for anything other than drybrushing, or at least mine was. But none of my old GW paints released in the shorter screw top or flip top hex pots are usable – they’re all dry.
**I have used oil washes on my Privateer Press Hordes Minion Farrow beasts, here is a image of my favourite beast, who I called Mad Max. I have also used a black oil paint to get a really good looking (in my opinion) white armour plating, on my Aleph Garuda Tacbot (there is a draft blog post on my to do list for this white armour).
Thanks for looking, and I hope you had a good Christmas!

Pingback: Legio Solaria; Bringing the War | Splayed Paint Brush
How much build up of colour do you get on the trims, is it worth making the trims with liquid mask or similar?
Great look in any case!
There is a bit of build up on the trims. Although I do try to avoid it, which is much easier when the armour plates are not on the sprue. The biggest difference is usually made with the consistency of the paint. The paler colours don’t cover so easily when thinned, so it’s a balancing act between how many paint layers your willing to do verses unwanted texturing from thicker paint. The thicker paint is what will cause build up on the trim. I am struggling painting the trim as is, I find it really tedious lol. I don’t think I have the patience to paint it with liquid mask first.