Broken brickwork crunched under the Warhound’s feet. The east wall of the ruined templum lay directly ahead of them. ‘Full stride, now!’ Orfuls cried. ‘We’ve got a wall in our face!’ Strakhov replied, dismayed. ‘Since when did that stop us? Full stride! Full stride!’
Titanicus, Dan Abnett
As I envision my AT table being an urban area (urban style mat and all the AT buildings), it made sense to base my Titan force to match. This led to the basing I created for my Knights before I actually had the models in hand, see my Knight bases post. This article is about creating the ‘urban ruins’ base for my Warlord Titan, with the added benefit of having the Warlord model.
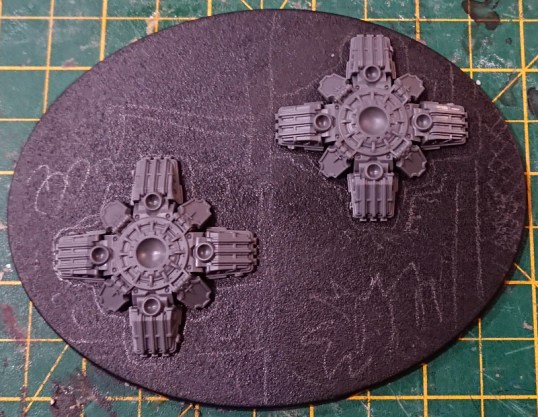
I find that it helps if I have an idea of what look I want to achieve with my base before I start. For the warlord this was to continue with the theme I had created for the Knights. The knights have a warehouse feel to them, there are ruined buildings, crates/containers, a loading vehicle, and the flooring texture is common across the all 3 models’ bases. I wanted to keep all this, but bigger, on the Warlord’s base. As it turns out however, the Warlord’s feet are massive and use up a sizable piece of base real-estate. So the first thing I did was to get a pencil and draw round the rough positions I wanted the feet to end up in. Then I doodled on to the base filling in the space with rough ideas of what I could put on to the base.
Things I’ve considered:
- Building crushed under foot.
- Bombarded road, exposing service lines (possibly flooded).
- Distress to road surface (cracking) caused by weight of Titan.
- Container/flatbed truck in yard, flattened by foot (?).
- Street lighting??
- Fencing/walls
- Crates, containers, barrels strewn over floor.
I didn’t want to spend a lot of time modifying the Warlord’s feet to look as if they are articulated to conform to the underfoot terrain, ie if the foot was crushing a truck then I didn’t want to spend a lot of time making the foot fit onto the crushed vehicle and the surrounding base. This led to some compromises, which I’m still thinking about if I am honest.
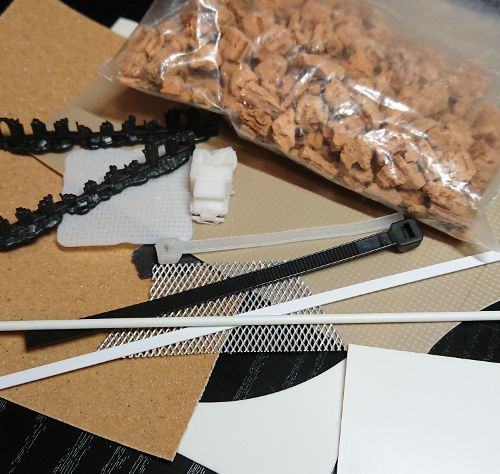
One of the fun parts about creating any model’s base is looking for interesting textures, items, model parts to use on the base. The Knight bases used scrap plastic, cable ties, Epic 40k ruins, and 3D printed items. In addition to those I am going to be using some wire mesh, sand paper, yet more plastic scraps (card, tubing, textured plastic, strip styrene), cork, and brass rod. Stuff any good bits box should have J
Road Closed For Repairs
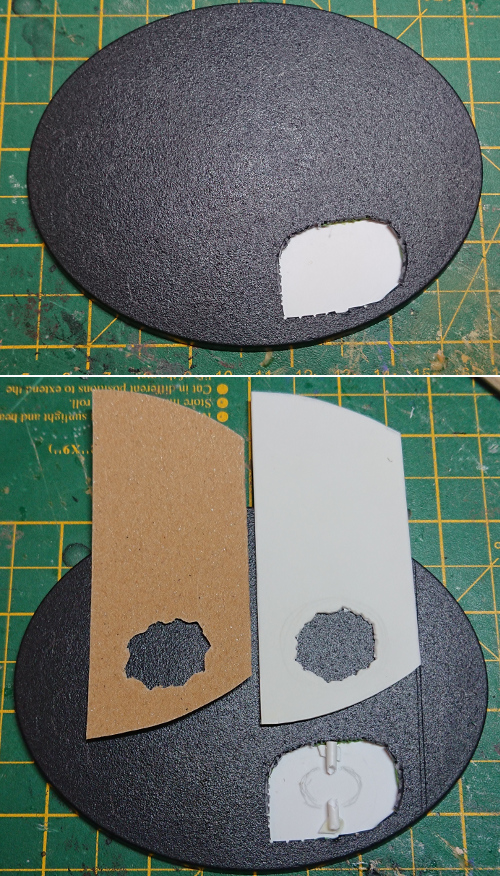
First up I needed to create the illusion of depth to the base. I did this by cutting a hole in the base in the rough location of where the blast crater would end up. I then attached a false bottom to the base with some thin plastic sheet and green stuff. I used another thin sheet of plasticard to make the road base. It is really just rectangle with the short ends shaped to match the base edges. I then drew and cut a jagged hole into the ‘road base’ where the crater was. Note that the hole in the road base is smaller than the hole in the actual base to allow for back filling of texture and details. I used sandpaper as th road urface. To do this I cut a piece of sandpaper to the size of the road base, and then cut a hole to roughly match the crater hole in the road base. The finest sandpaper I had was 100 grit – I think a higher value would be better for the road surface, but its all I had. After roughing up the plastic surface of the road base a little to get a key on the plastic sheet I then glued the sandpaper to it.
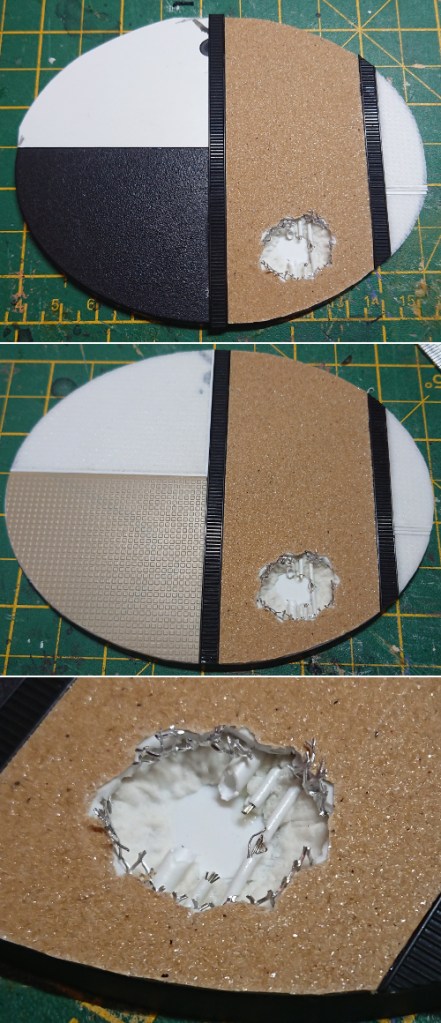
Polyfiller was used to give the sides of the crater texture. I left the bottom smooth plastic to allow me to paint it as a liquid later on. I also added plastic tubing chopped up for the broken service pipeline, as well as a bit of wire for cabling. Around the lip of the crater I added some aluminium mesh, for that reinforced concrete look. I then glued the road surface on top. With the road in position I could start to build up the texture on the rest of the base. I added cable ties, and because I had used plasticard to make a base for the sandpaper for the road, I had to use plasticard to raise the other textured surfaces so they were the same height as the road. The other surfaces were scrap plastic strip, waste 3D print raft supports, to match the Knights’ bases. The other surface was square textured plasticard, where I intended the crushed building to go.
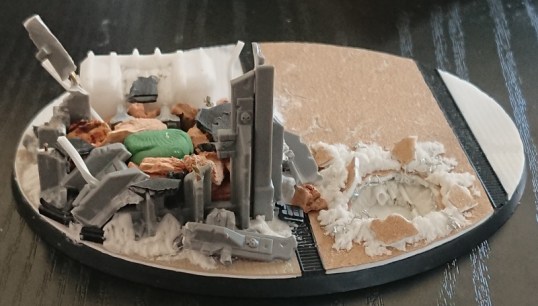
Building Demolition
Now I started work on the building being crushed under foot. I messed around an awful lot with the placement of the epic ruins as I could not get them to work as I intended. I have hopefully avoided too much of the titan being obscured by the base, but that you can still tell it was a building that the foot is stood on. After all I hope the titan will be worth looking at once painted. I have to admit I got a bit of ‘analysis paralysis’ in trying to work out how to make this building. In the end I just went for it, otherwise I’d still be thinking about it now. The plan was to fill the inside with rubble to make it look like pretty much the entire building has been crushed by the titan. Now as space was getting a bit limited and I wanted to keep the foot as level as possible (to avoid me thinking I had to articulate the ‘toes’) I decided to also add a crushed container. As if the container was adjacent to the building and the foot had come down on top of both. I crushed a 3D printed container in a vice, and cut down some of the walls to a similar height. This gave me a set height to mount the Warlord’s foot.
I actually broke the vice jaw trying to crush items for this base, so be wary of doing this. Make sure to actually weaken the structure to be crushed.

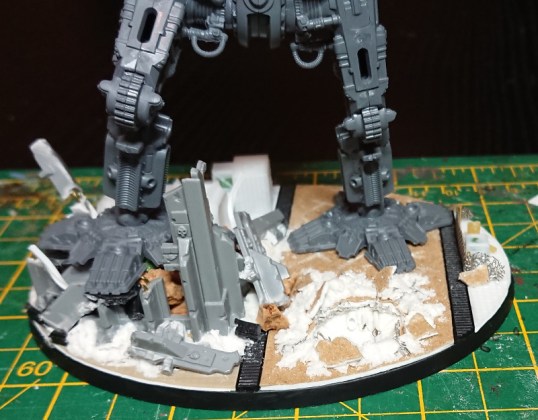
I glued down the container, and building outer walls, and then just cut the walls a little in places to make the foot more stable.

With the container and building walls in place I filled the middle of the building with greenstuff as a solid anchor for the model’s foot. Then I added bits of building rubble – cut off sections of the ruins, scrap plastic, cork. I used the cut out section of base for a flooring/roof like texture, brass rod and wire for the re-bar look. Making sure to make the underfoot section looked as much like compacted rubble as I could. Around the outside of the building I used polyfiller to add finer rubble, to which I added small chunks of plastic – I thought this would work better than just gluing down sand. With the building now finished I went back to the road to add piled up debris around the crater hole using the same technique.
Finishing Touches
I 3D printed a vehicle, reminds me of a heavy haulage tractor unit, I intended to build a trailer for it as if it was used to move the containers. However the tractor unit itself ended up pretty big and as such I am not sure if I will use it.
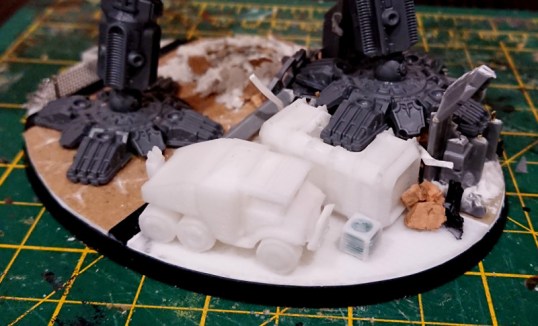
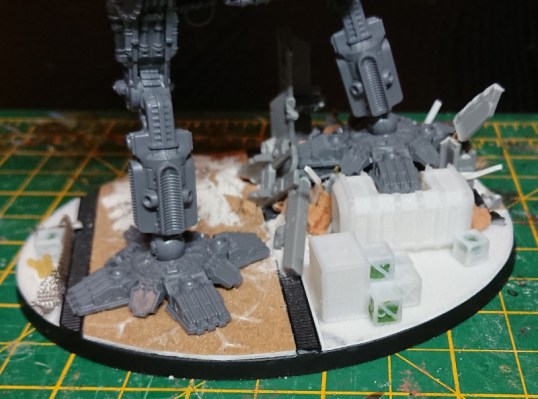
I added some 3D printed crates, these were used previously on my Knight bases. I attempted to make a pallet of oil drums. The pallet is just thin plasticard, and the oil drums are cut up dried spaghetti. Scrap plastic was added as more debris. Fine wire mesh was used as fencing, with brass rod as fence poles. I also tried to use a knife to cut lines into the sandpaper under the foot to represent the Titan’s weight cracking the road surface.

Base painting is underway, I’ll come back and edit this post when I finish it.

Pingback: Adeptus Titanicus: Warhound Leg Adjustments | Splayed Paint Brush
Pingback: Legio Solaria; Bringing the War | Splayed Paint Brush