Like a bad film sequel we’re back with the goal post. I was never quite sure I’d finished the goal, but I hadn’t really worked out what I was going to do. I wanted it to look like a goal that had been around while but still looked after. To achieve this I added a little wear and tear to paint up and some vegetation.
How long’s a piece of string?
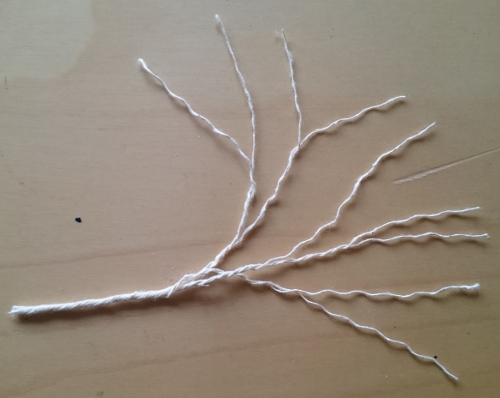
To create climbing ivy branches I used piece of string. From a plain old ball of string, like this one. I cut a short length and unravelled it from one end, but still twisted together at the opposite end. This was done in such a away to have the string unwind from a single ‘trunk’ to form thick branches, and then on to progressively smaller branches unto the last strand is reached. When you see it laid out on the table you’ll see it looks like a spreading out tree anyway. This just needed transferring to the column.
It was a simple process, soak the string in PVA glue and wrap it round the column in such a way to make it look like a plant growing up the column. There are no pictures of the next steps – my hands were covered in PVA glue.
However this is what the column looked like the next day after the PVA had dried.
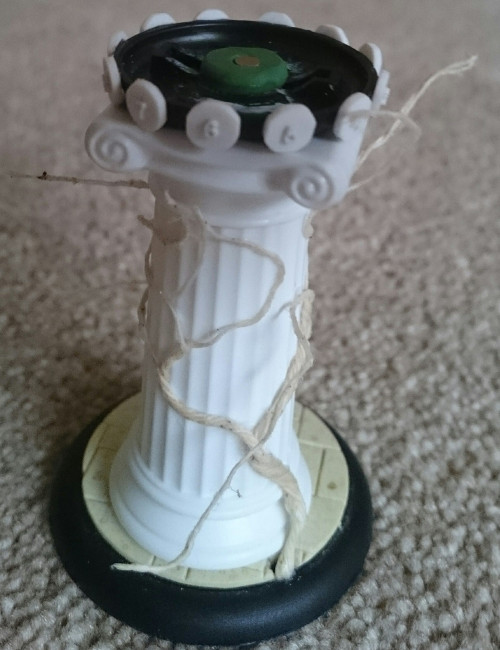
As you can see in the above picture, I had a starting place in mind to grow the plant from. This also meant I had a good idea how long the unravelled portion of the string needed to be to give me just enough large diameter trunk. I worked from the bottom up in shaping the branches, unravelling as needed to get what I wanted. I found the string was easy to work with once soaked in PVA. It is worth mentioning that I was not too worried about getting everything perfect at this point. I was really just after the general shape.
As the PVA dries the string hardens and becomes quite stiff, while still allowing a wide variety of positioning the branches. Once dry I then tidied up the branches by cutting them to length. I also spent some time roughing up the surface of the column a little in places to use super glue to attach the string. This is because the PVA didn’t have enough hold on the smooth plastic column, but this also allowed the easy re-positioning.
Pruning
The above set of pictures show the column after I had trimmed the excess and glued the branches into their final positions.
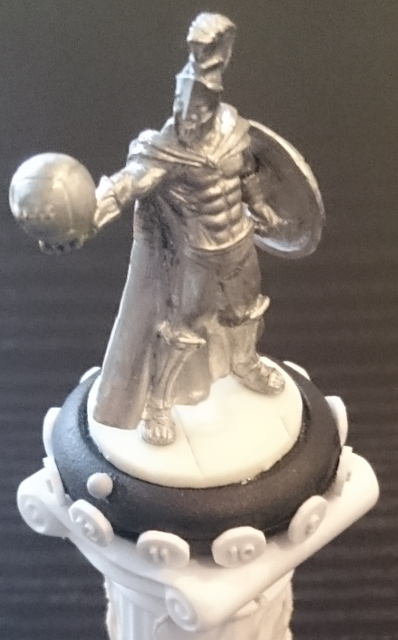
Score Marker
By now I have played around with the goal post for a little and I realised that the outstretched arm which was intended to indicate the score wasn’t easy to read at a quick glance. So to aid in quickly reading and changing the score I have added a small marker to the statue’s base. The marker is the top of a Zinge Ind. rivet, off one of their rivet sprues I had knocking around. The rivet head is lined up with the outstretched arm, but is much faster to look at as it is right next to the score numbers.
Final Finishing Touches
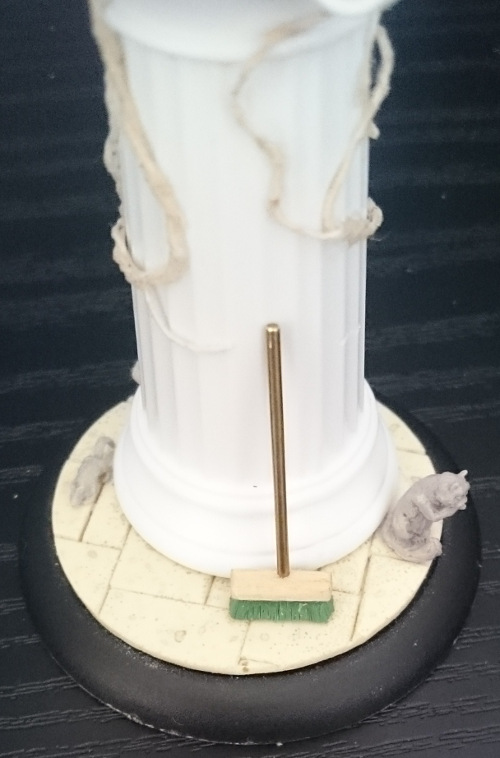
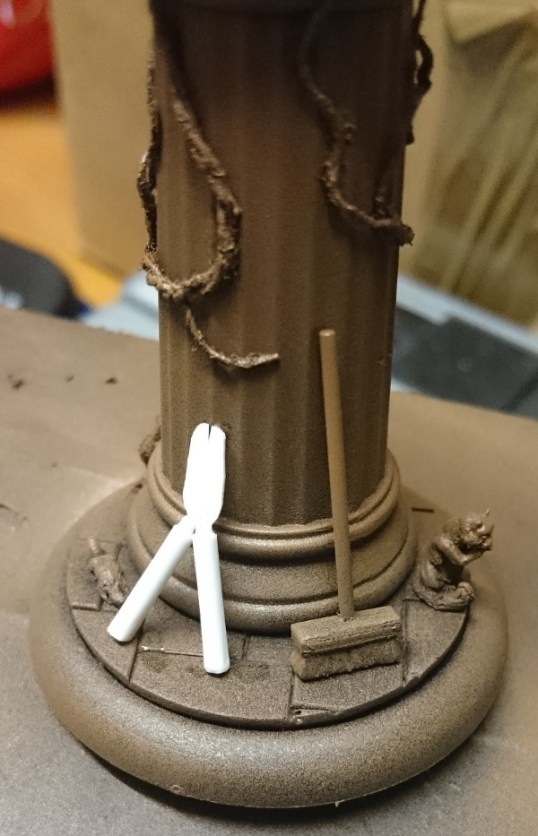
I like it when a model tells a story, a micro diorama if you will. At the start of this post I mentioned that I intended the goal to look like it’d been around while but still looked after. To try and portray this I thought I’d add some gardening tools left at the base of the column after pruning the ivy.
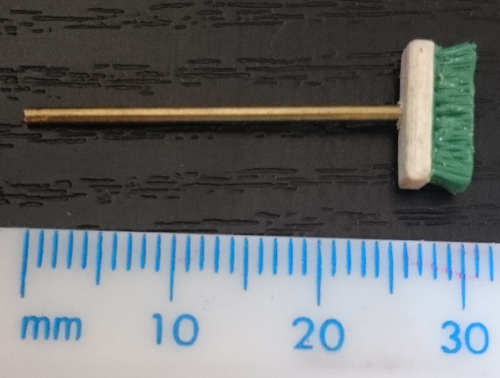
The brush is made out of a small piece of coffee stirrer (I have coffee stirrers for man and dog, that’ll be my next post probably), the handle a section of brass rod, and the bristles are sculpted from greenstuff. Once painted up I’ll a pile of leaf litter next to the brush.
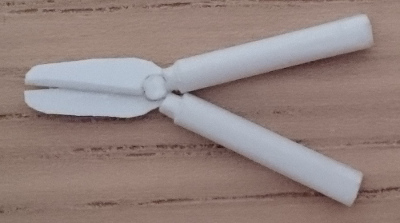
The shears are thin plastic cut to shape and glued together, then attached to a short section of tube. I had intended to make the handles out of thin brass rod covered in greenstuff, but I had real trouble doing that, so much so I actually gave up on them. However I decided to give them one last go and I ended up using plastic strip bar for the handles, rounded off a bit with a needle file and cut down to size. The end that joins to the blades was rounded down further to look like a metal tang within a wooden handle.
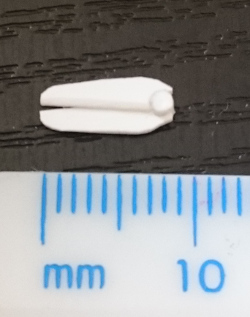
The finished pair of shears…
Finally, I wanted to add a little humour, I originally wanted a seagull to sit on top of the statue (maybe this explains why a Seagull). I spent some time searching the net for something usable. The closest I got to that were some ravens by HQ-Resin at Hexy-Shop.com but I didn’t think I could pass them off as Seagulls. After a while I settled on a mouse hiding from a cat, inspired after browsing through Hexy-Shop’s products. I ordered the cat/mice and the ravens, and I have to say the sculpting and casting is excellent – if these are typical of their products than I can highly recommend them.
The finished (for a second time) goal post. You may have noticed the lack of shears, that is because I had given up on them when this picture was taken.
However, as i actually got the shears built, here is a picture with them included, and mostly prime undercoated.
Yeah, those shears have ended up pretty BIG!

Pingback: Guild Ball Goal – Painting the post | Splayed Paint Brush