I started building my Ordo Sinister Psi Titan, from my last post. Started almost as soon as I’d finished that last post; there’s just been a delay getting this post written. The kit goes together really well, most of it being the plastic warlord obviously. The Forgeworld resin was nicely cast with minimal clean up work required for my kit. I really like the instructions that come with the Forgeworld kit, in some ways I think they are better than the plastic Warlord instructions.
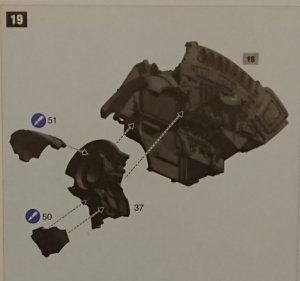
As the Psi Titan is essentially an upgrade to the warlord it would have been good for the Psi Titan instructions to reference where they superseded the warlord instructions. For example, I almost made the mistake of attaching the warlord’s overhead armour plate and chest plate. The Forge World instruction #12 places the head on the body section. This could have said do not attach parts #50 and #51 from Warlord instruction #19. Make sure to leave off these two armour plates.

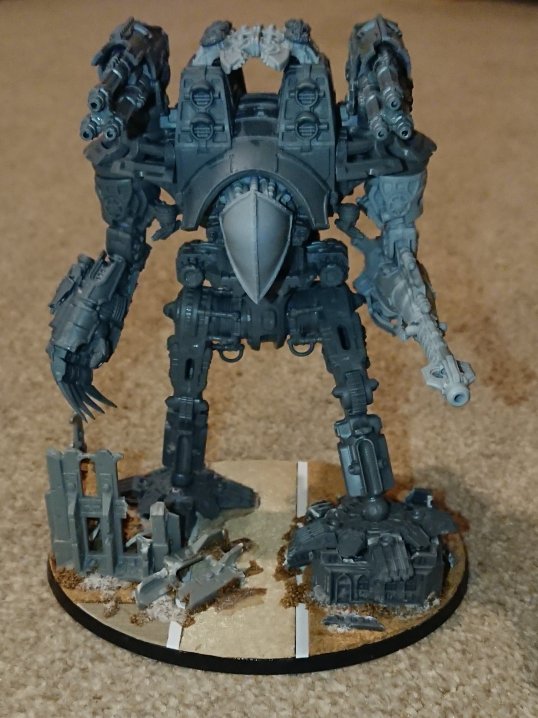
As I said earlier the kit does go together nicely, and here is the naked Psi Titan and its base.
This post has actually been delayed while I am waiting for some extra parts. I have ordered some Scibor parts for additional ‘lion’ iconography. They are taking their time coming into stock at EG – I think Scibor is having a mad rush on their Lion range with the release of the Ordo Sinister Titan 🙂
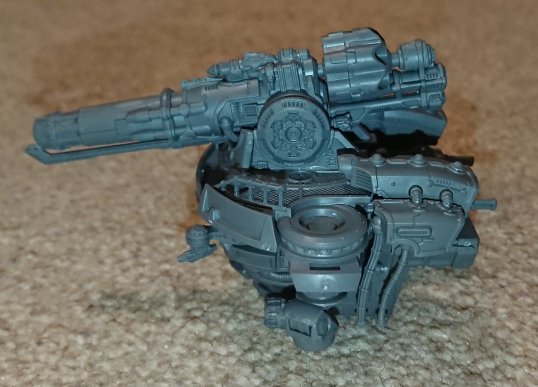
As I’m still waiting for them to be delivered, I started building my Nemesis Warbringer Titan. This kit went together really well too. I have yet to build a base for the model to stand on, but as I assembled the Warbringer in its out-of-the-box stock pose the base won’t be that adventurous. Before anyone asks, yes the barrels are all drilled – madness I know! Here she is, the Warbringer in all her armour-less glory waiting undercoating.

I also played with magnets on this kit, the weapons are magnetised easily using 5x1mm disc magnets just like the Warlord. The arm mounted Volcano Cannon and Laser Blaster, and even the shoulder mounted AA guns are all recessed to accept 5x1mm magnets as part of the sculpt. I did not bother magnetising the carapace Quake Cannon, as it sits on top in quite a deep recess anyway. However, I did magnetise the Quake Cannon’s magazines on the rear of the titan. Just in case the carapace Bellicosa Volcano comes with alternate magazines/power modules.
Magnetising the magazines was straight forward. Taking queues from the arrows mounting the magazines in Warbringer instruction #47. I drilled 2mm diameter holes at those locations on the Titan torso and the corresponding locations on the magazines.

After checking my magnet polarities I glued a 2x1mm disc magnet into each hole. Then I pushed the magazine onto the mounting point to ensure the magnets seated at the right depth.

There was only one snag with my Warbringer build. My carapace Quake Cannon has elevation dysfunction – it can’t keep it up! 😦
The instructions do say not to glue the cannon to the mounts. I must not have been paying attention to my build at the time I did this. As the cannon has ended up quite loose now.

I’m sure once it gets a lick of paint it’ll come good again, and this flaccid cannon will droop no more.
Unto next time – and hopefully some paint!!!

Pingback: Legio Solaria; Bringing the War | Splayed Paint Brush
Pingback: Legio Solaria; Bringing the War | Splayed Paint Brush